Blockchain technology is revolutionizing supply chain management by enhancing transparency and traceability. At its core, blockchain is a decentralized ledger that records transactions across multiple computers, ensuring data integrity and security.
In supply chains, this technology is employed to create a transparent and immutable record of product journeys from origin to consumer. Each step in the supply chain, from raw material sourcing to manufacturing to distribution, can be recorded on the blockchain, providing real-time visibility and reducing the risk of fraud and errors.
This increased transparency helps in verifying the authenticity of products, ensuring compliance with regulatory standards, and fostering trust among stakeholders. Blockchain applications also enable the use of automated smart contracts, which can streamline operations and payment processes. This integration enhances efficiency and supports sustainability by enabling the tracking of ethical sourcing and environmental compliance.
The goal of this tutorial is to get you familiar with Kaleido and the FireFly platform and show you how together they can help you quickly launch a track and trace application.
By the end of this tutorial you will have:
The scenario that we will be modeling today involves two organizations, Manufacturer and Seller who operate on a shared, permissioned blockchain.
The tutorial will also show you how to view everything that transpires on and off chain. Let’s go through the 8 steps to build your own on-chain supply chain – all of which can be done in 15 minutes or less.
If you haven’t already, sign up for a Kaleido account here. Create an account and password and you will be all set. Everything in this tutorial can be done on the starter tier which is free!
To get started, use the Create A Network button. This will prompt you to select your home region. Next you will set up your environment. For this tutorial, we will be using the Standard Blockchain Service + FireFly Supernode, an option available when you select an Environment Type.
Next your will choose your protocol. For this example, choose Ethereum. Next you can deploy via cloud and select Quorum as your provider and IBFT as your consensus algorithm. For a more detailed look at protocols, consensus mechanisms, and other features, check out our blog on how to build a blockchain.
In this tutorial, you will need to create two memberships, two FireFly nodes, two Blockchain Nodes, and two IPFS nodes. You can name these whatever you want however we will be referring to them with the following names.
Memberships (2): Manufacturer, Seller
FireFly Nodes (2): FF_Manufacturer, FF_Seller
Blockchain Nodes (2): Node_Manufacturer, Node_Seller
IPFS (2): IPFS_Manufacturer, IPFS_Seller
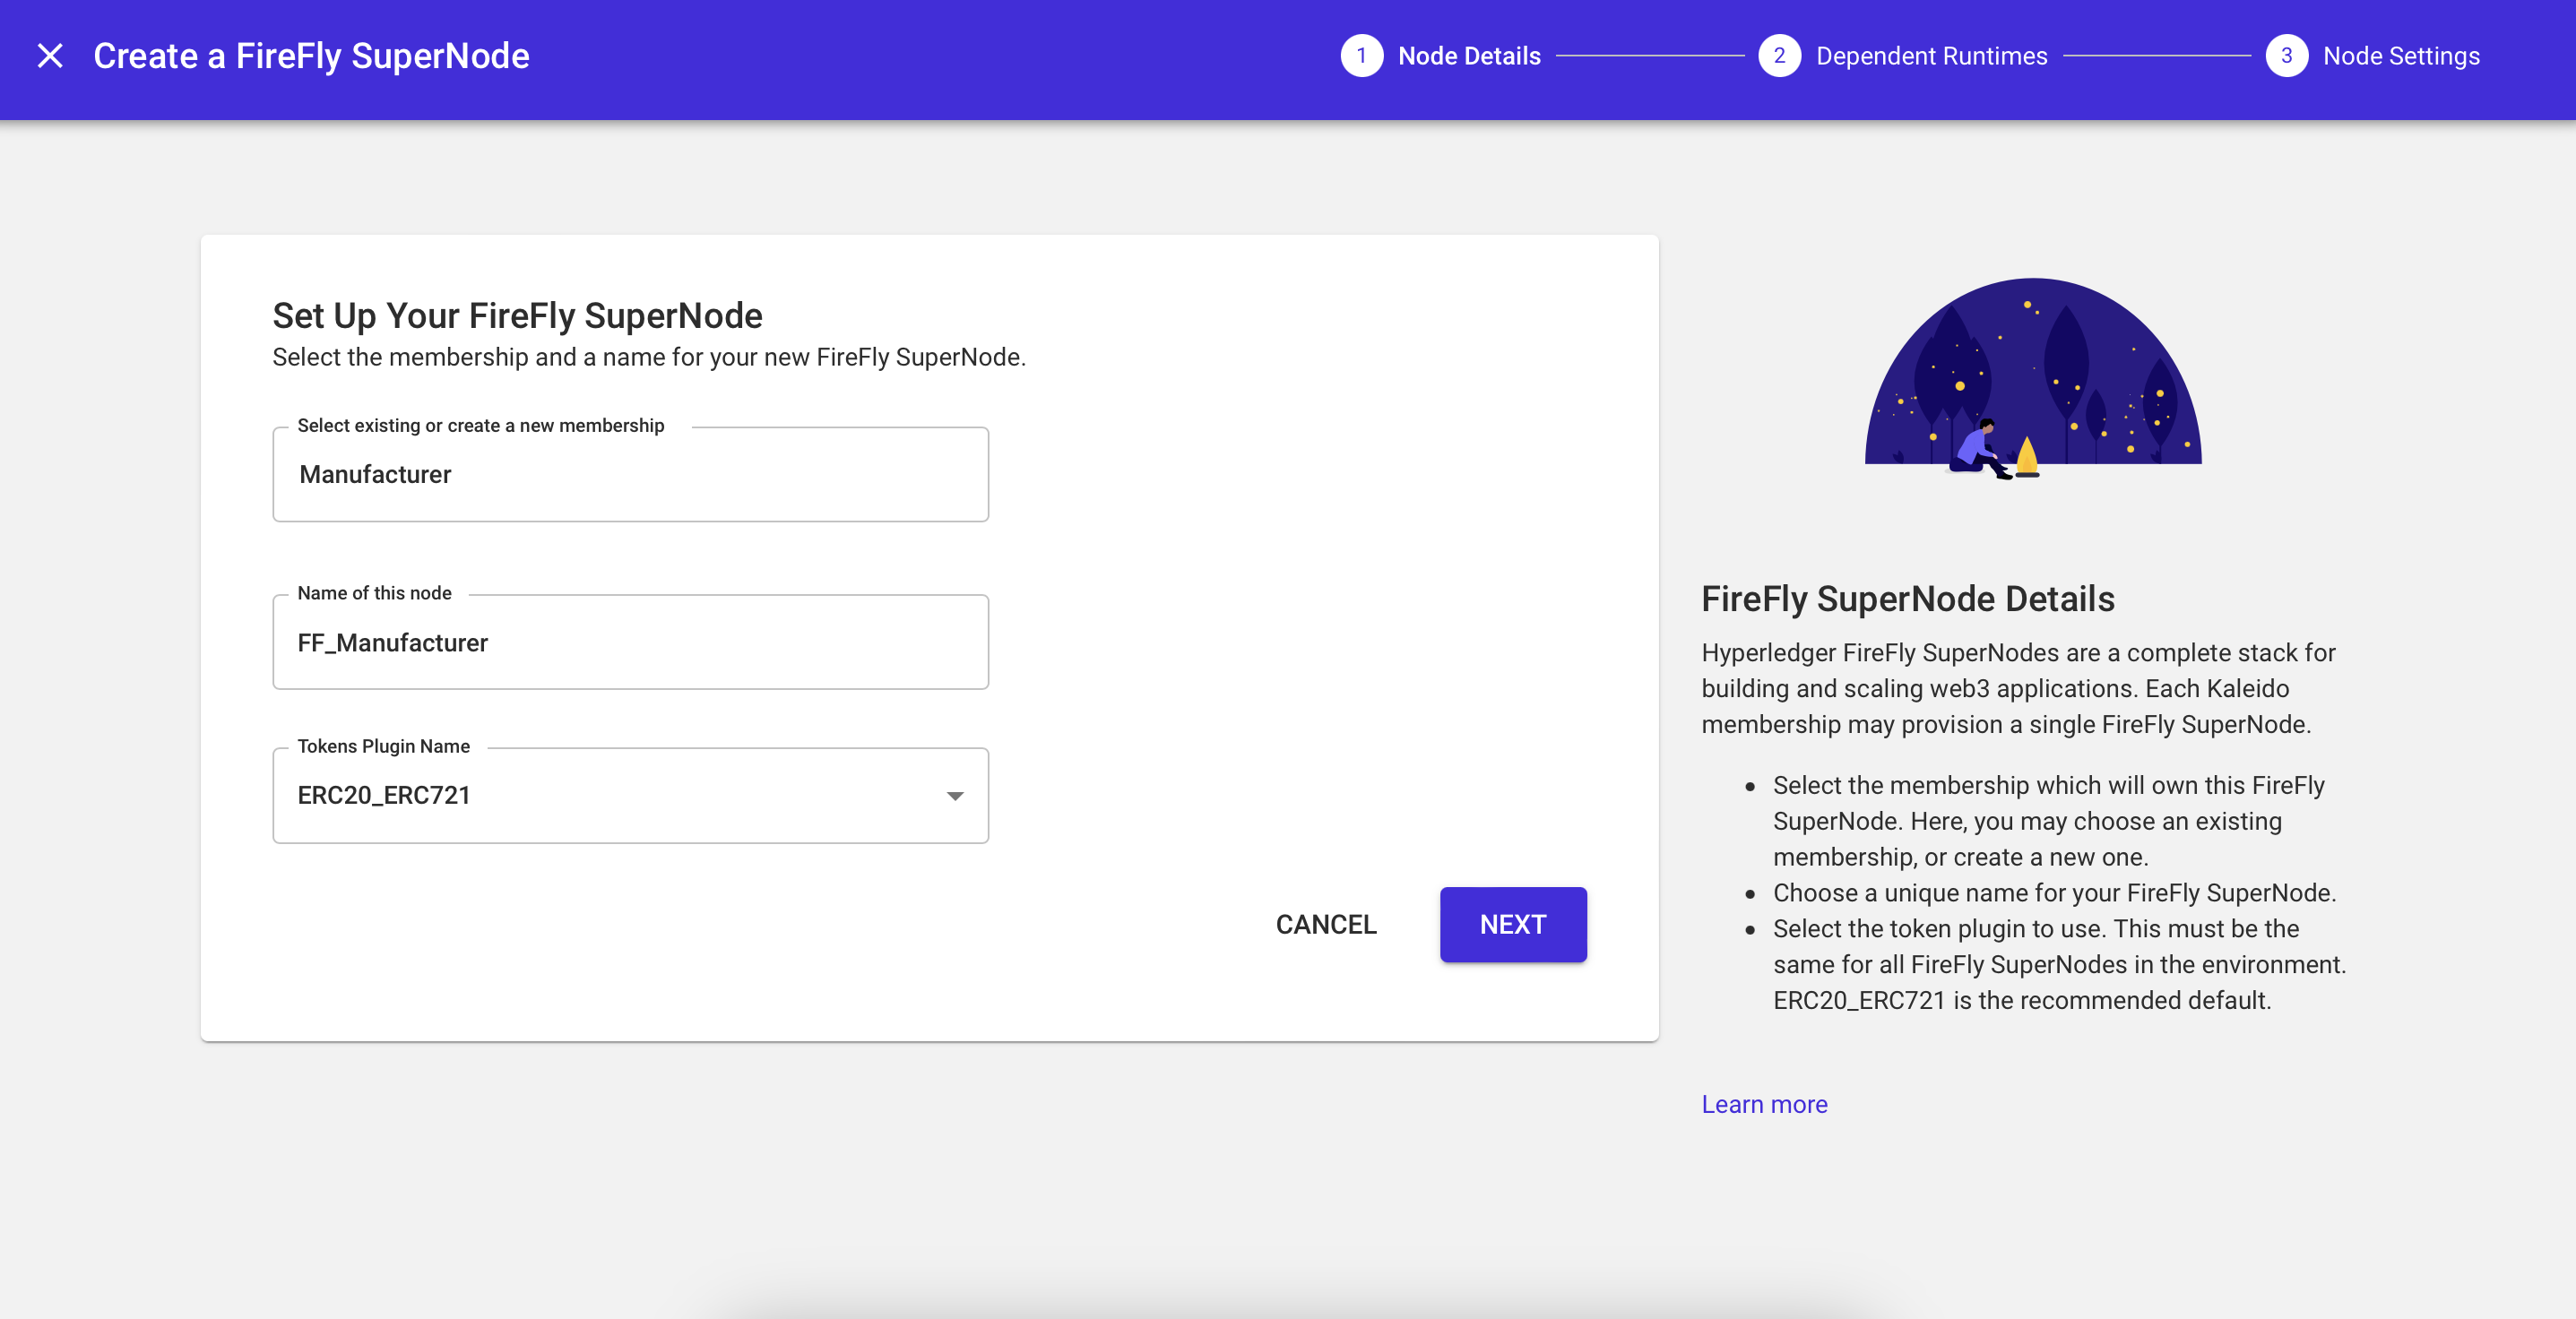
You will work through a screen like the one above for both your Manufacturer and Seller memberships.
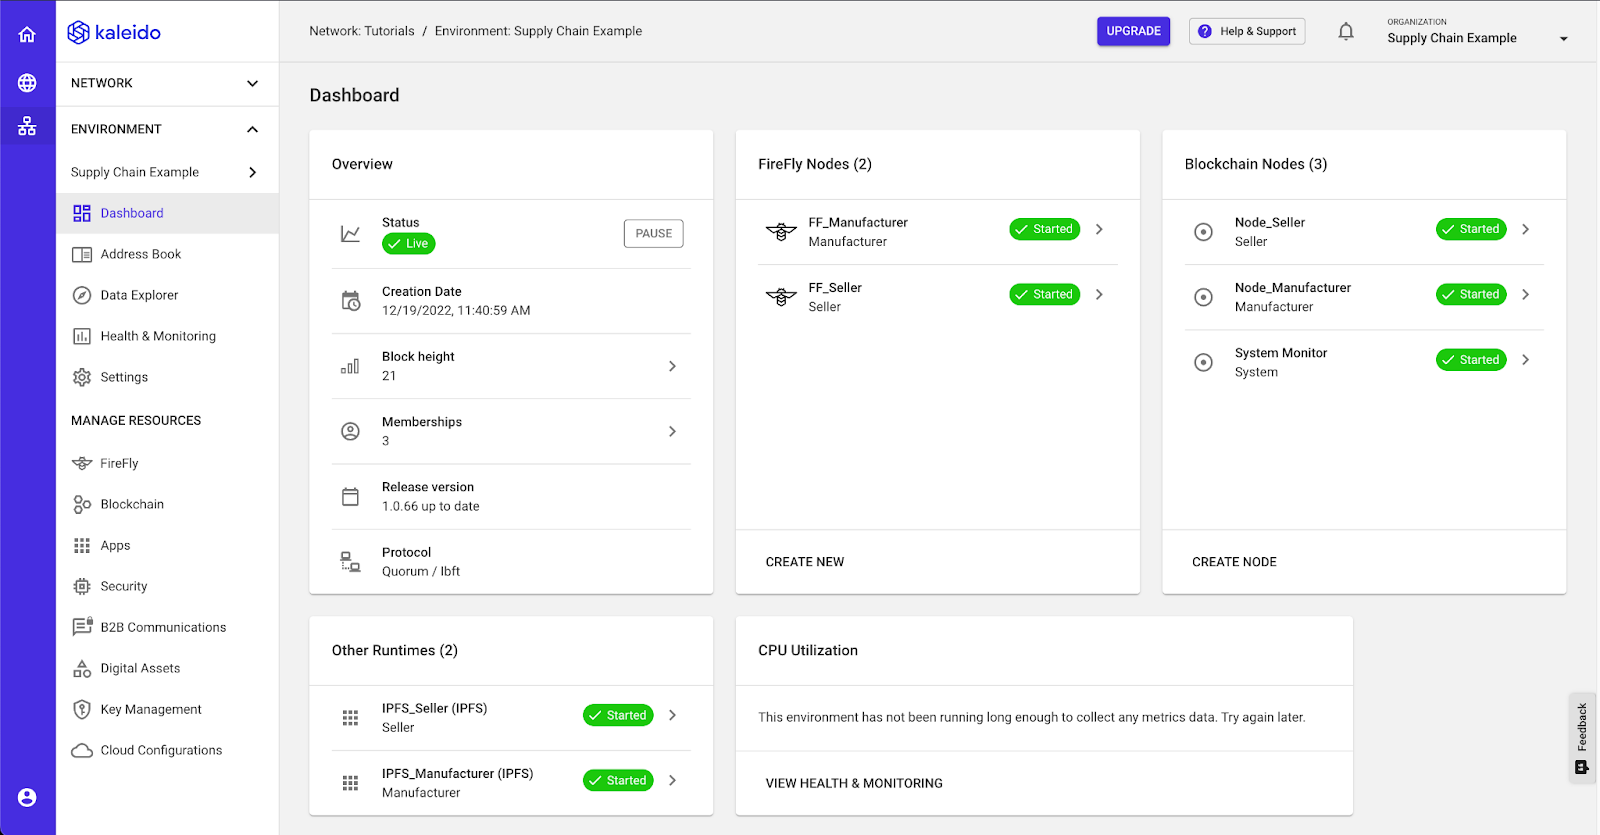
Once your network loads, which may take a couple minutes, you will be brought to a dashboard that looks like this.
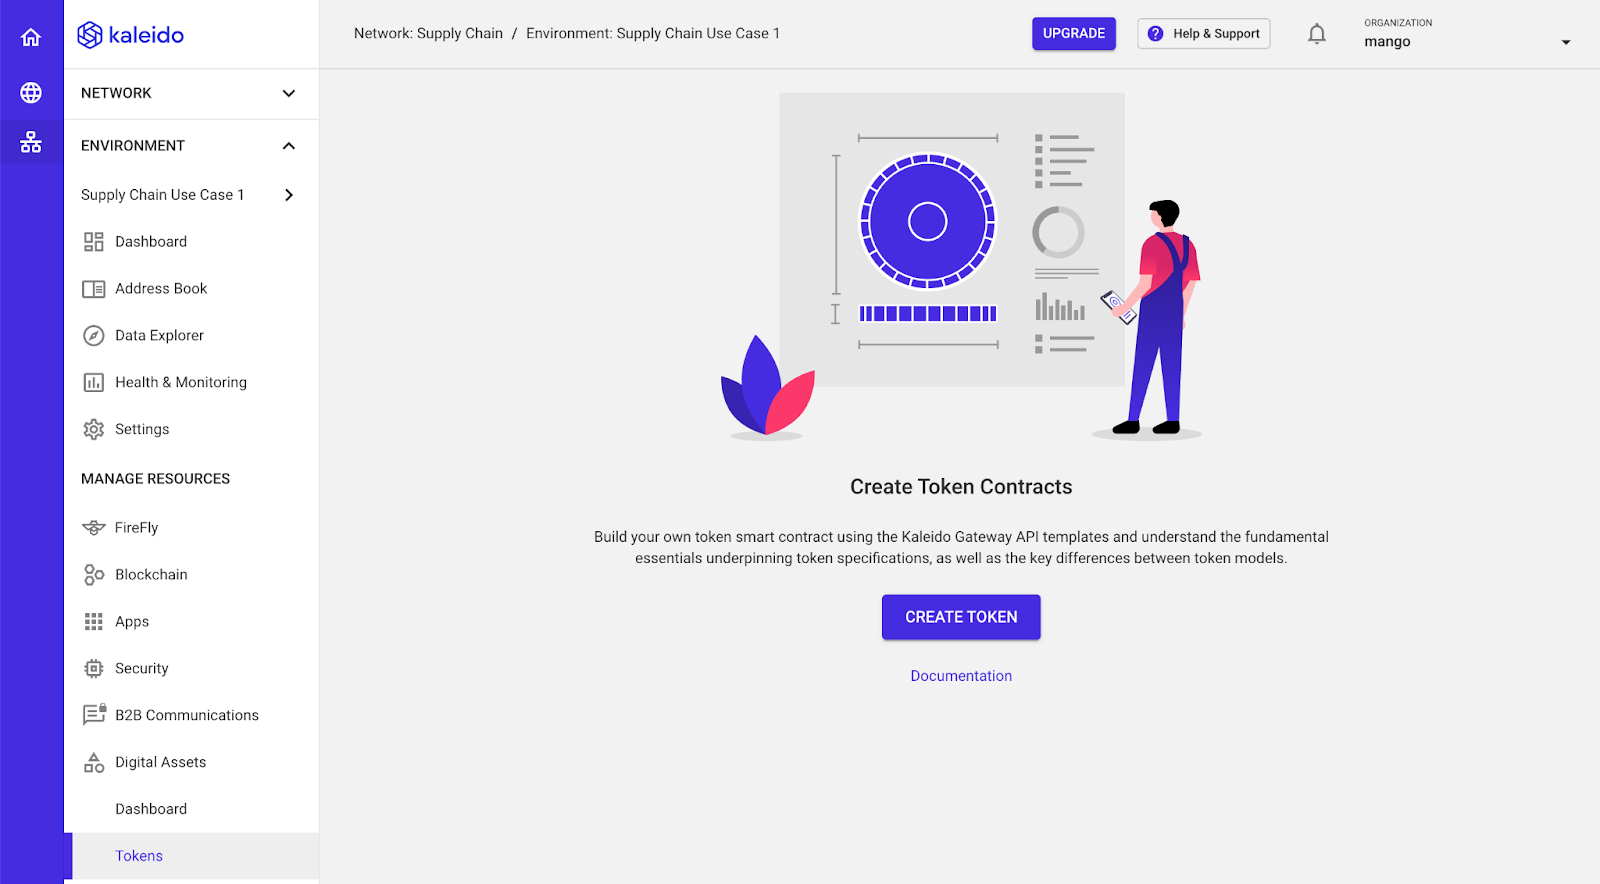
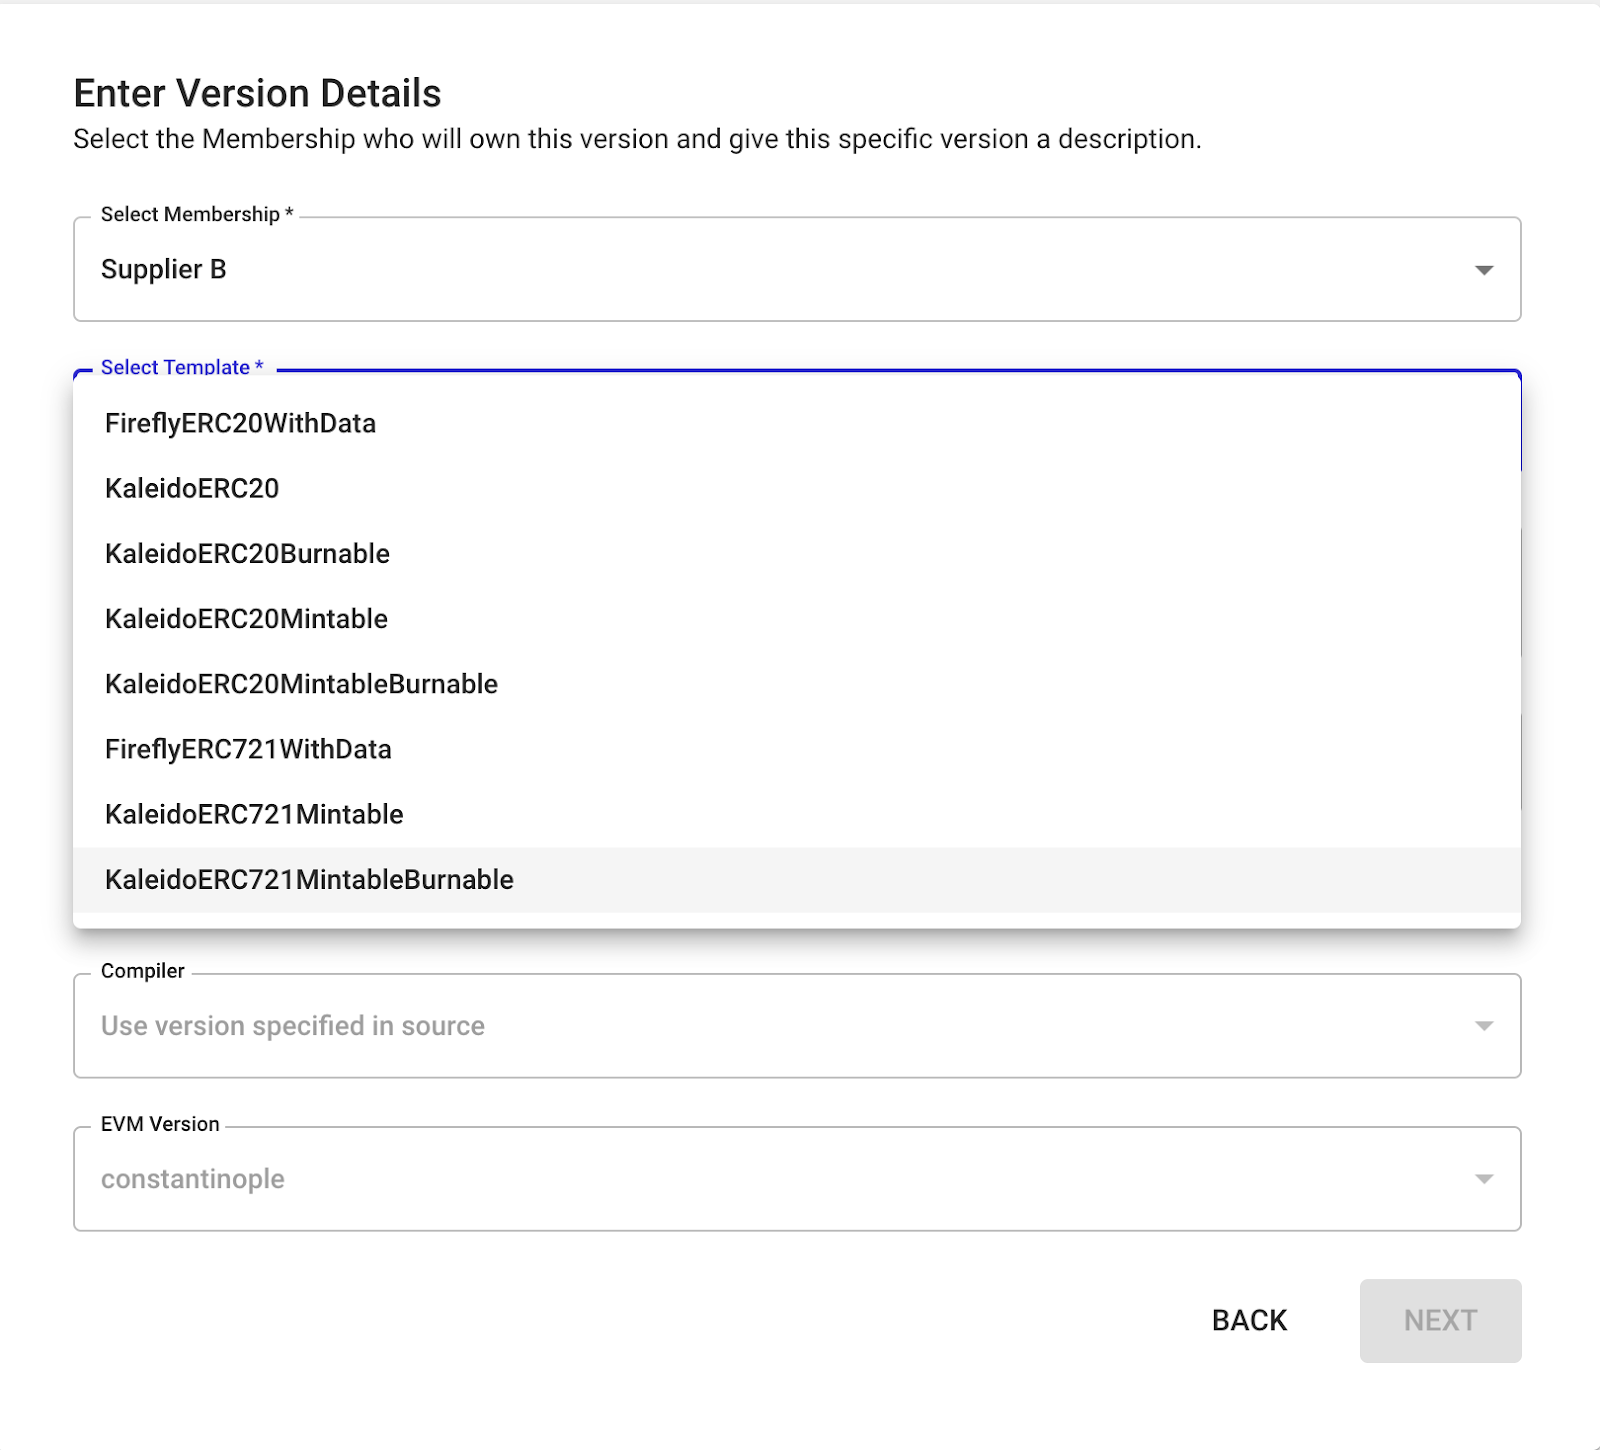
Click on Digital Assets > Tokens to create your ERC721 contract. You can choose the signing account and utilize the Token Factory. For template type, select KaleidoERC721MintableBurnable and follow the instructions.
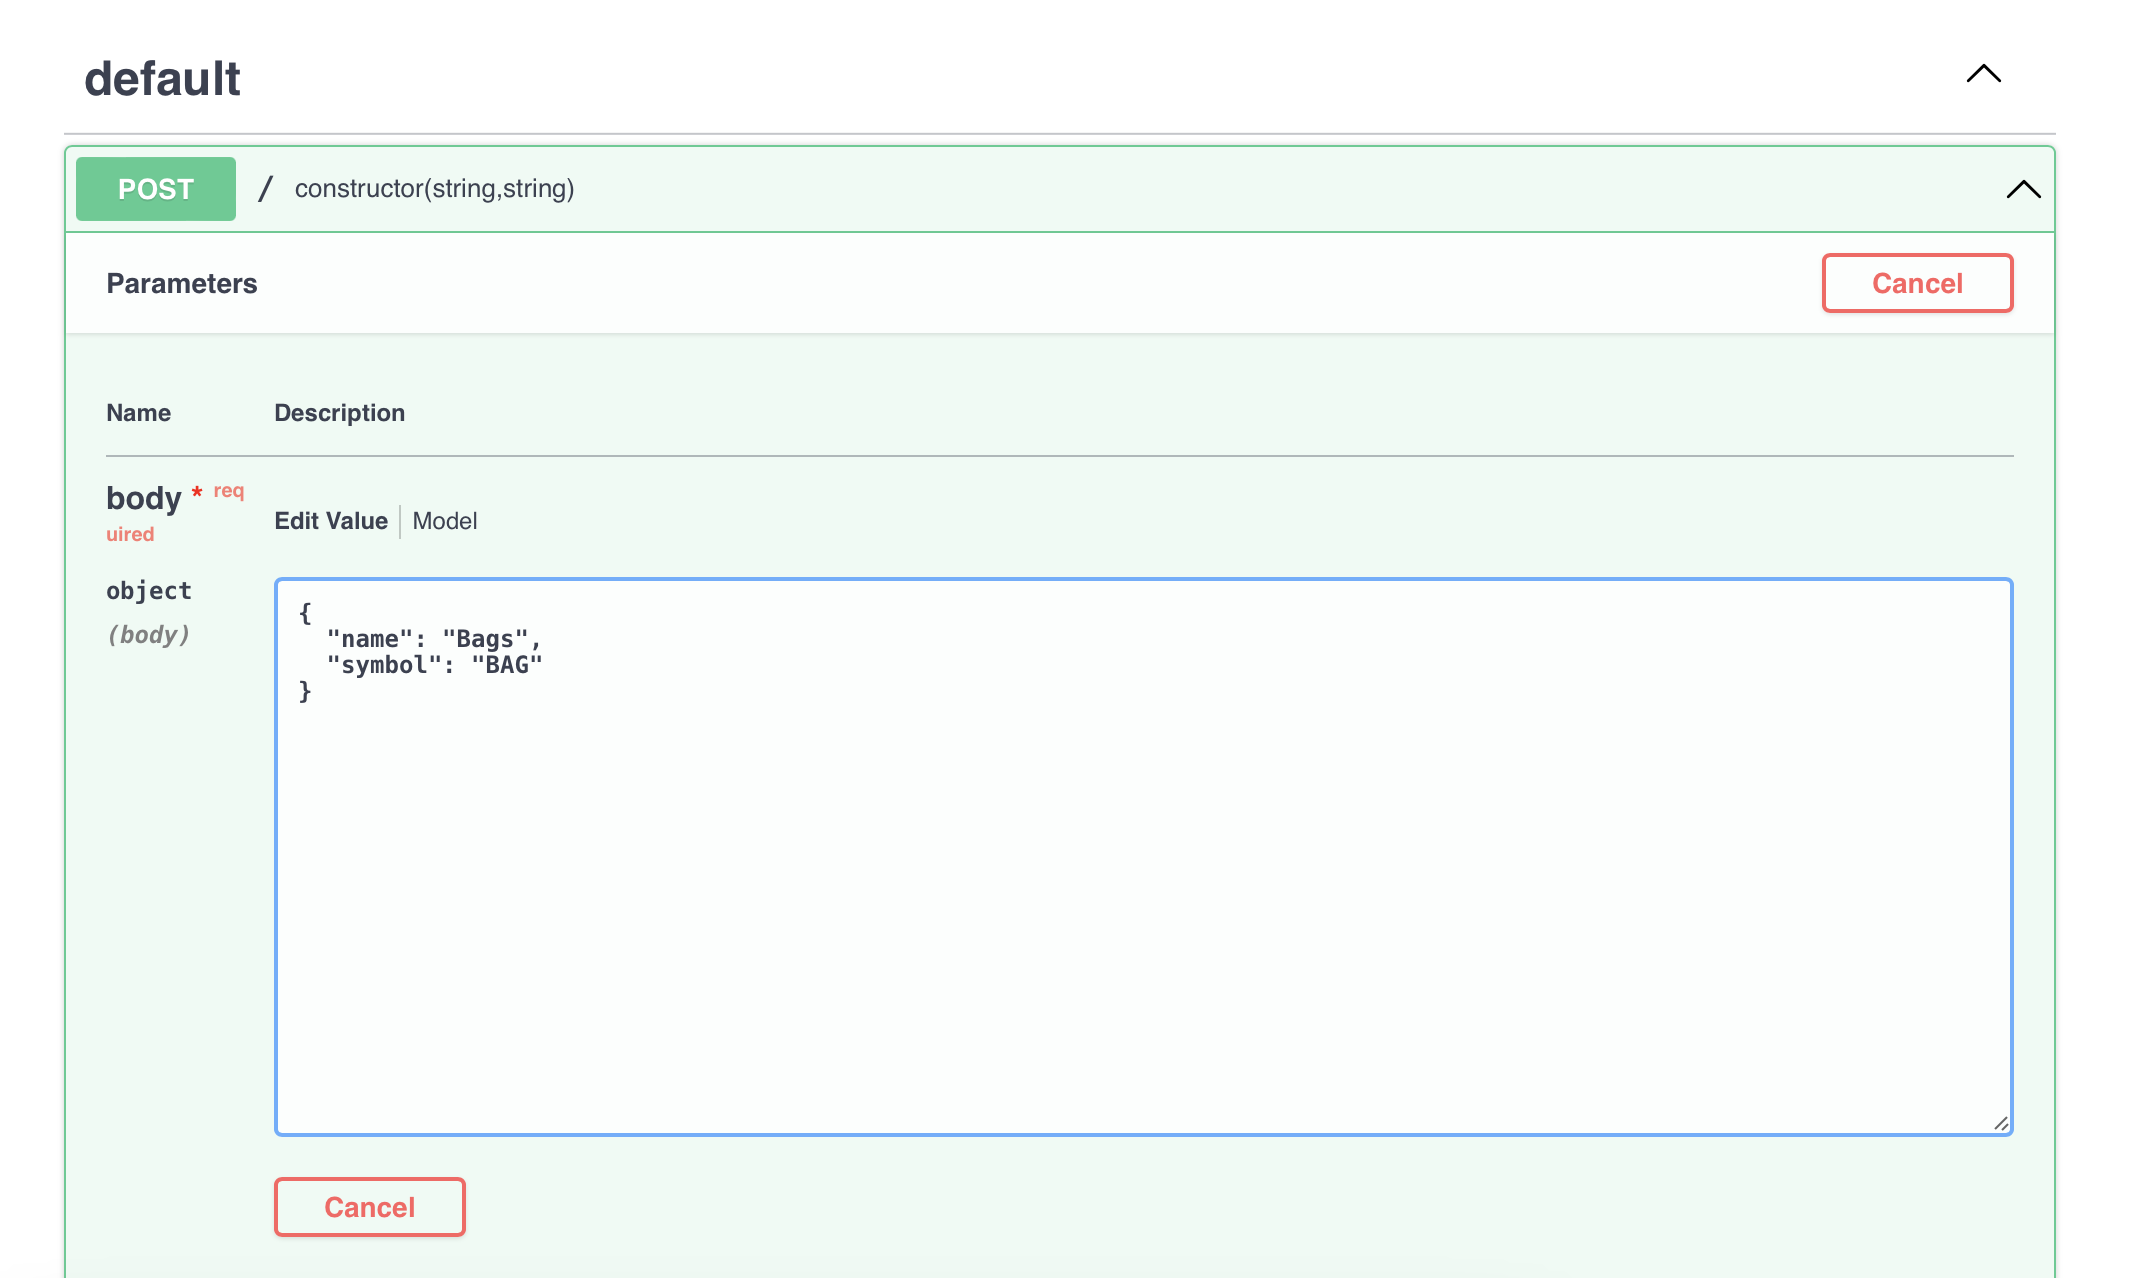
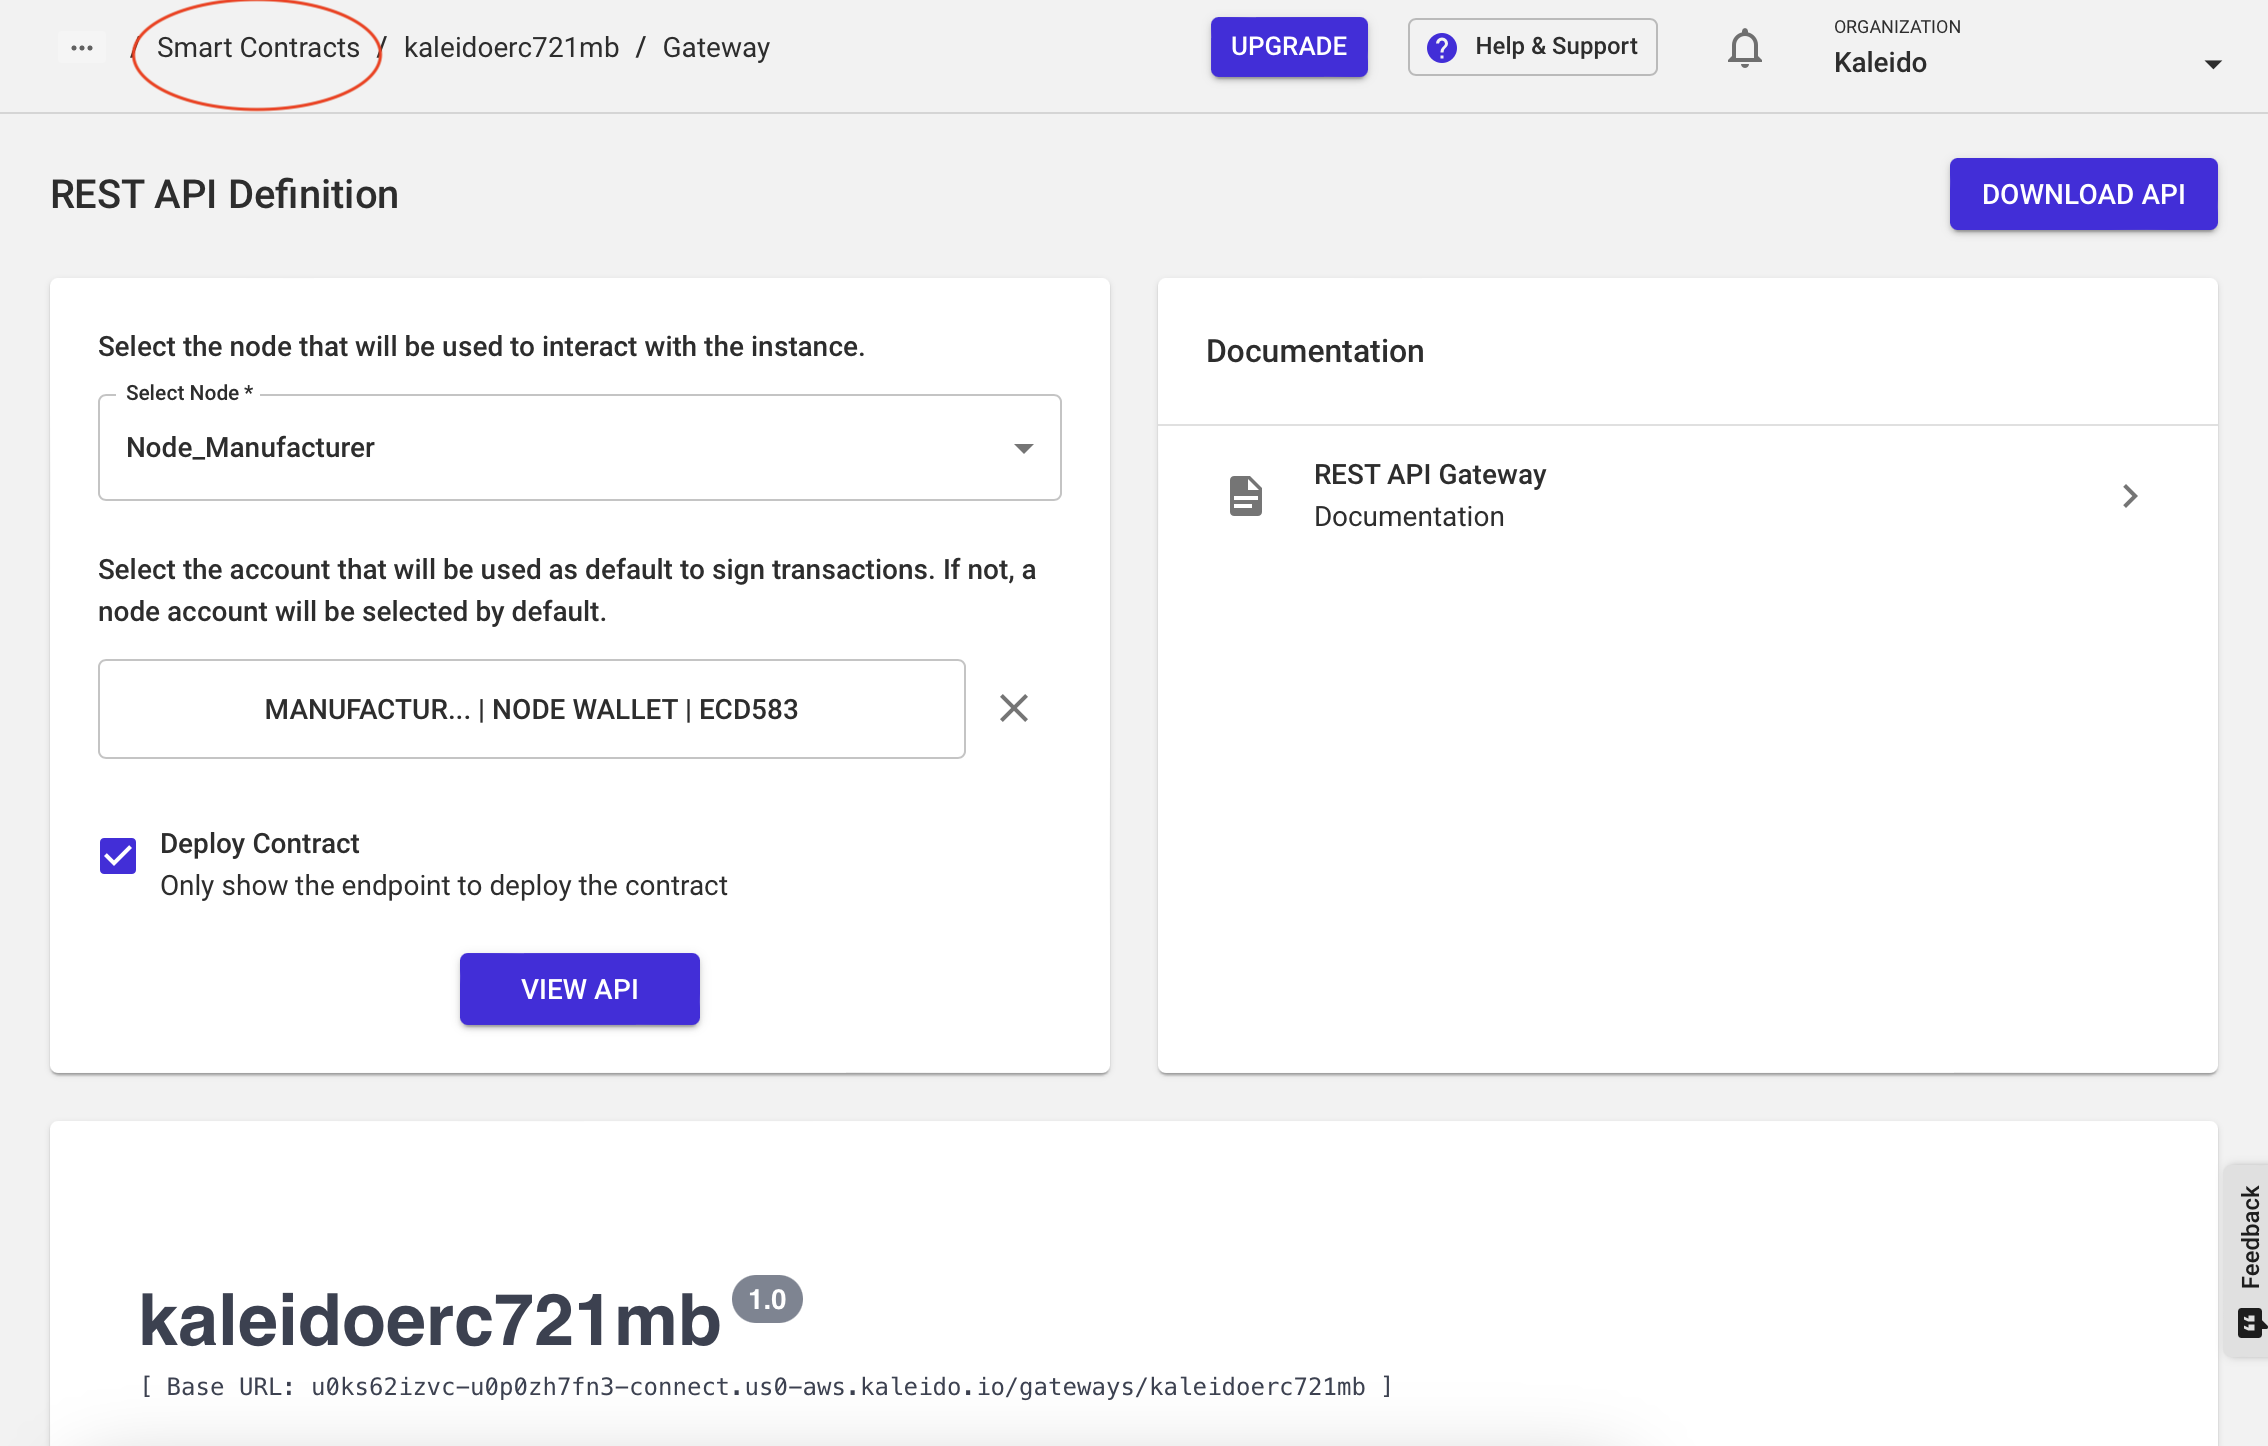
Next, click on Apps > Smart Contracts on the left navigation bar. Here you will see the ERC721 contract template that you just created. Click on the button labeled “View API.”
Expand the POST / constructor(string,string) field and click “Try it out”. Then edit the strings next to name and symbol. This is where you name your NFT and give it a token symbol. For purposes of the demo, we will use “Bags” as the name and “BAG” as the symbol.
After clicking execute you can use the breadcrumbs to navigate back to the Smart Contract Details page.
Here you should see your contract under “Smart Contracts.” Select it and copy the address value.
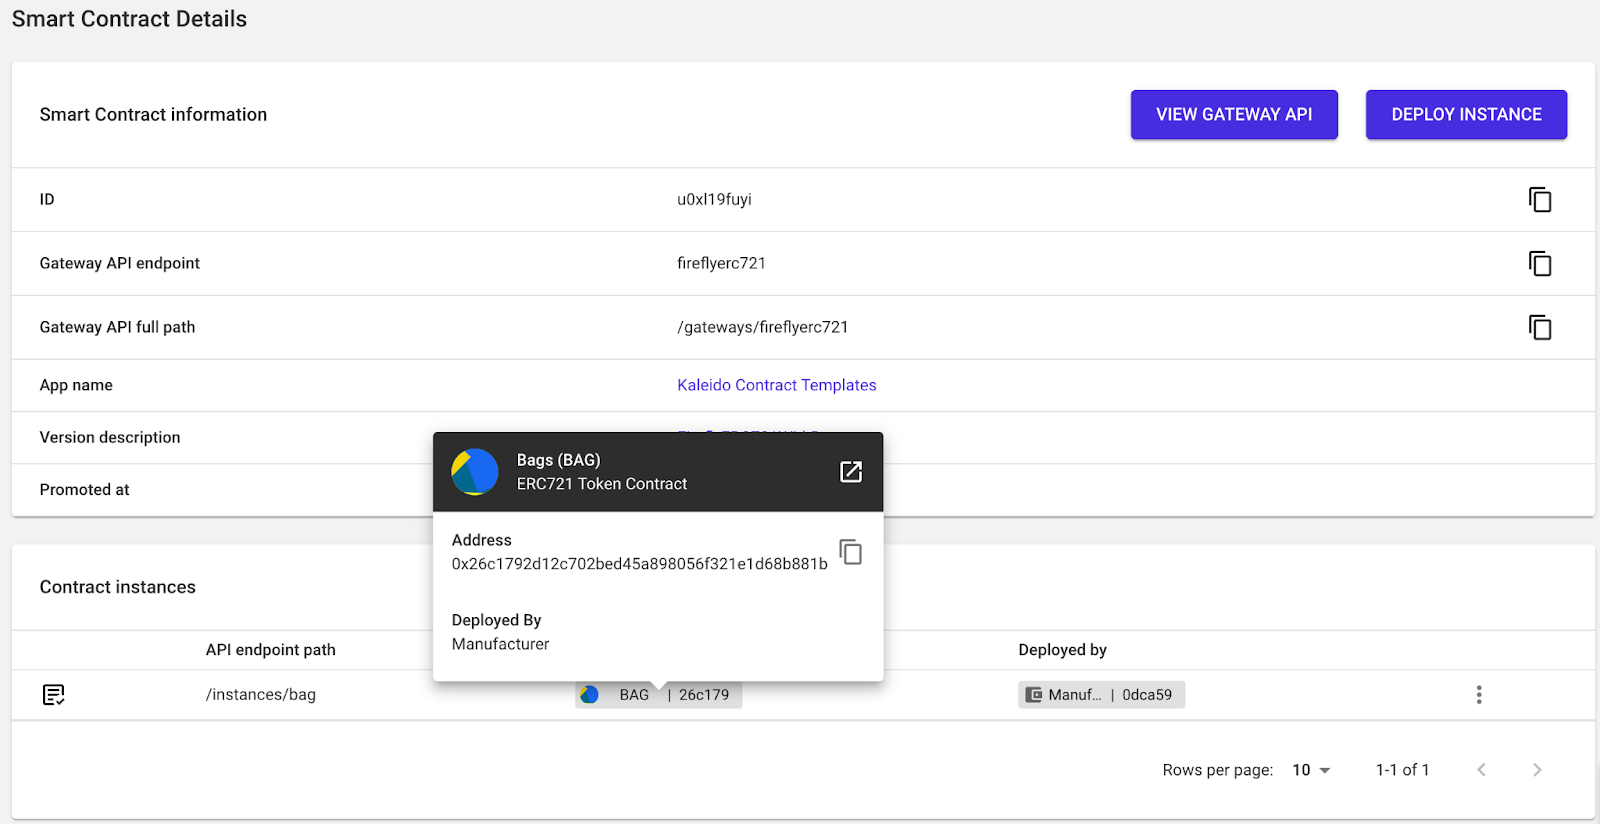
What we have just done is use the ERC721 contract template that was preloaded to create your own NFT contract. You may deploy as many NFT contracts as you want, however, for this demo we will only be using one.
Click FireFly and select the FireFly Node “FF_Manufacturer”. Click “Open Web UI” for both the FireFly Explorer and the FireFly Sandbox. Navigate to the Sandbox and click on the Tokens tab.
Create a token pool by entering the Name & Symbol of the NFT you just created. Make sure Type is “Non-Fungible” and for the contract address paste the address that you copied in the previous step and click “run”. Once the operation is done, FireFly can now interact with your contract.

In the Sandbox, go to the next field which is “Mint a Token”. Select the token pool you have just created and enter “1” for the token index. The token index keeps track of NFTs minted by the contract. Since NFTs are non-fungible, each NFT must have a unique index (i.e. no other token created can have an index of “1”).
Next, click on attach a message and upload a file. This allows you to attach a file with any sort of data to your NFT. In this case, we will upload an image of a yellow bag. This is to show what bag Manufacturer will be shipping to Seller. Input a Tag and a Topic for easier searching in the FireFly UI.
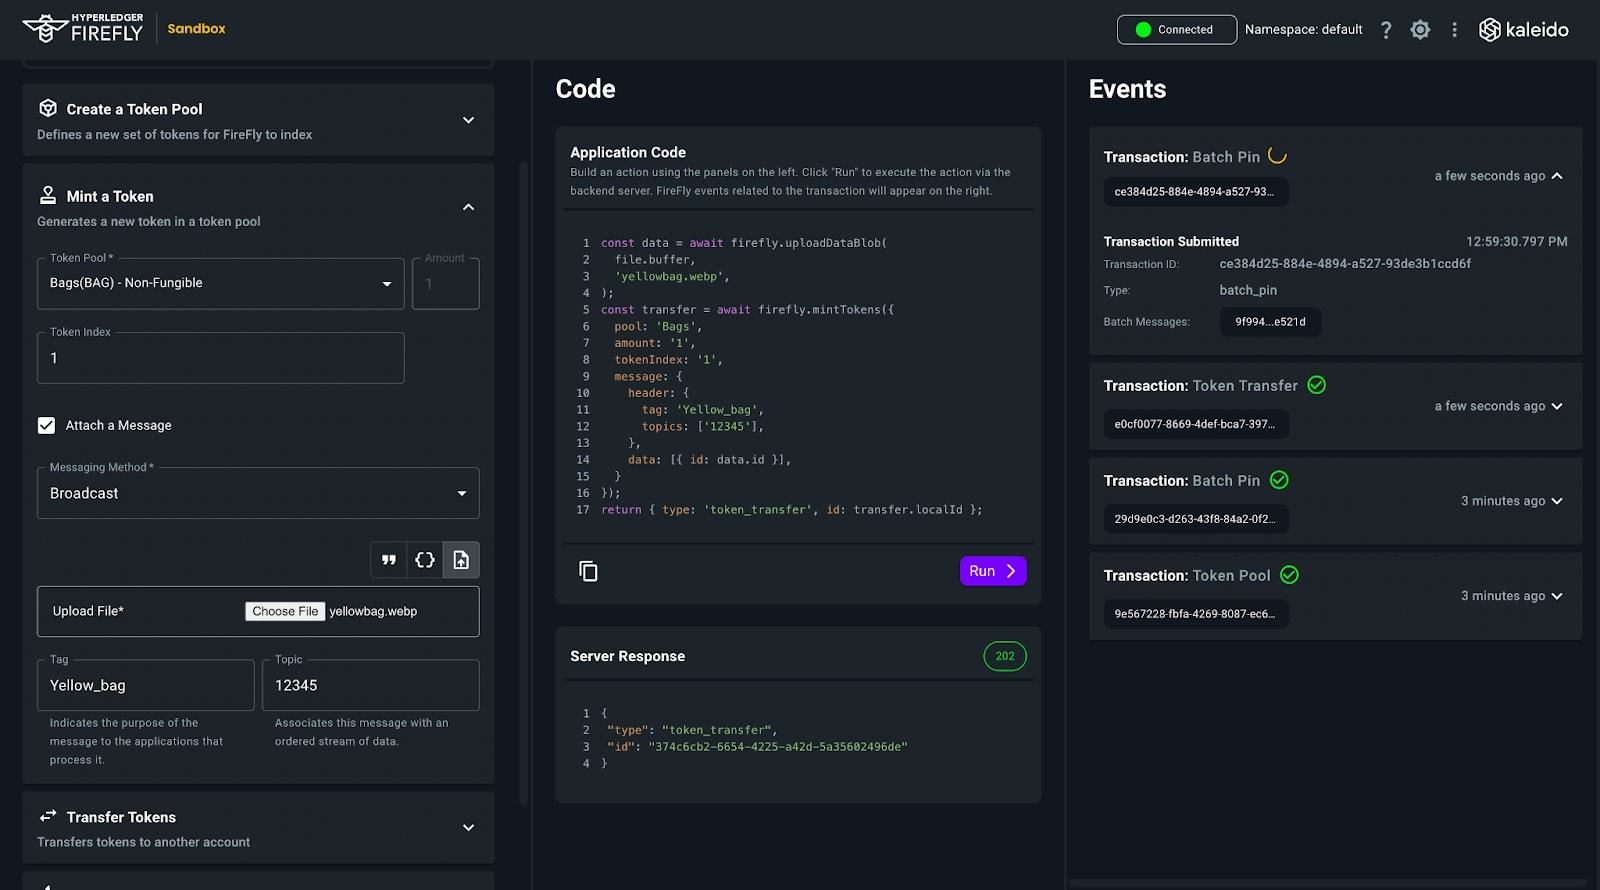
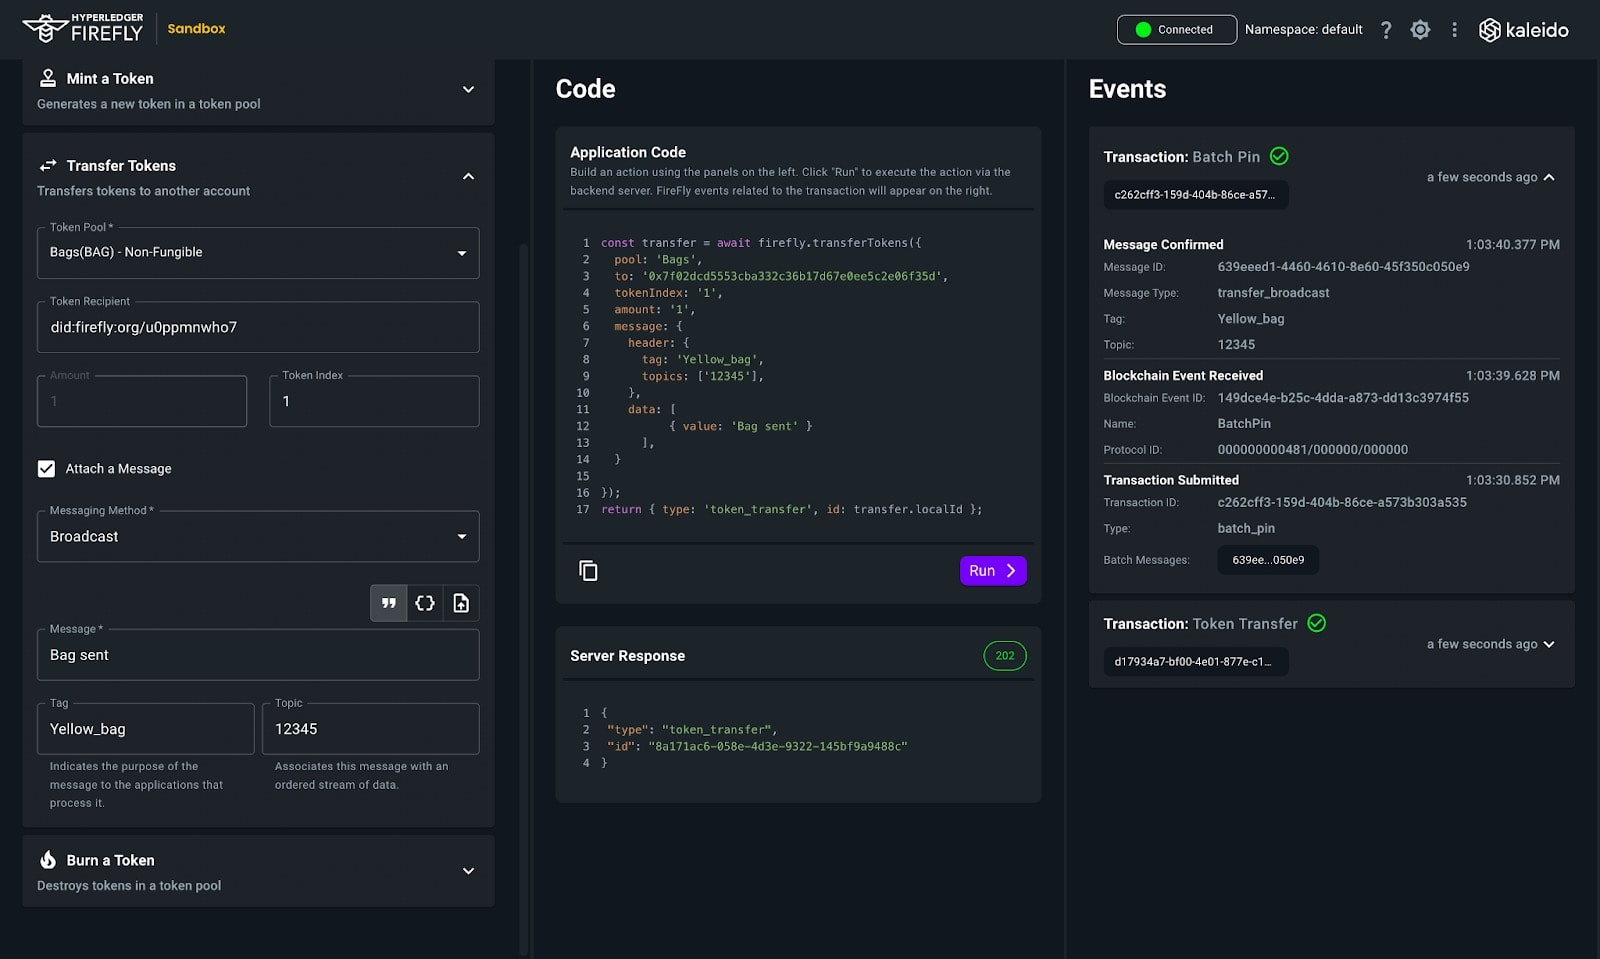
Click on Transfer Tokens in the Sandbox and attach a message to let Seller know that the bag has been sent. Make sure to enter a token index of 1, select the correct recipient, and enter the same Tag and Topic as you did above.
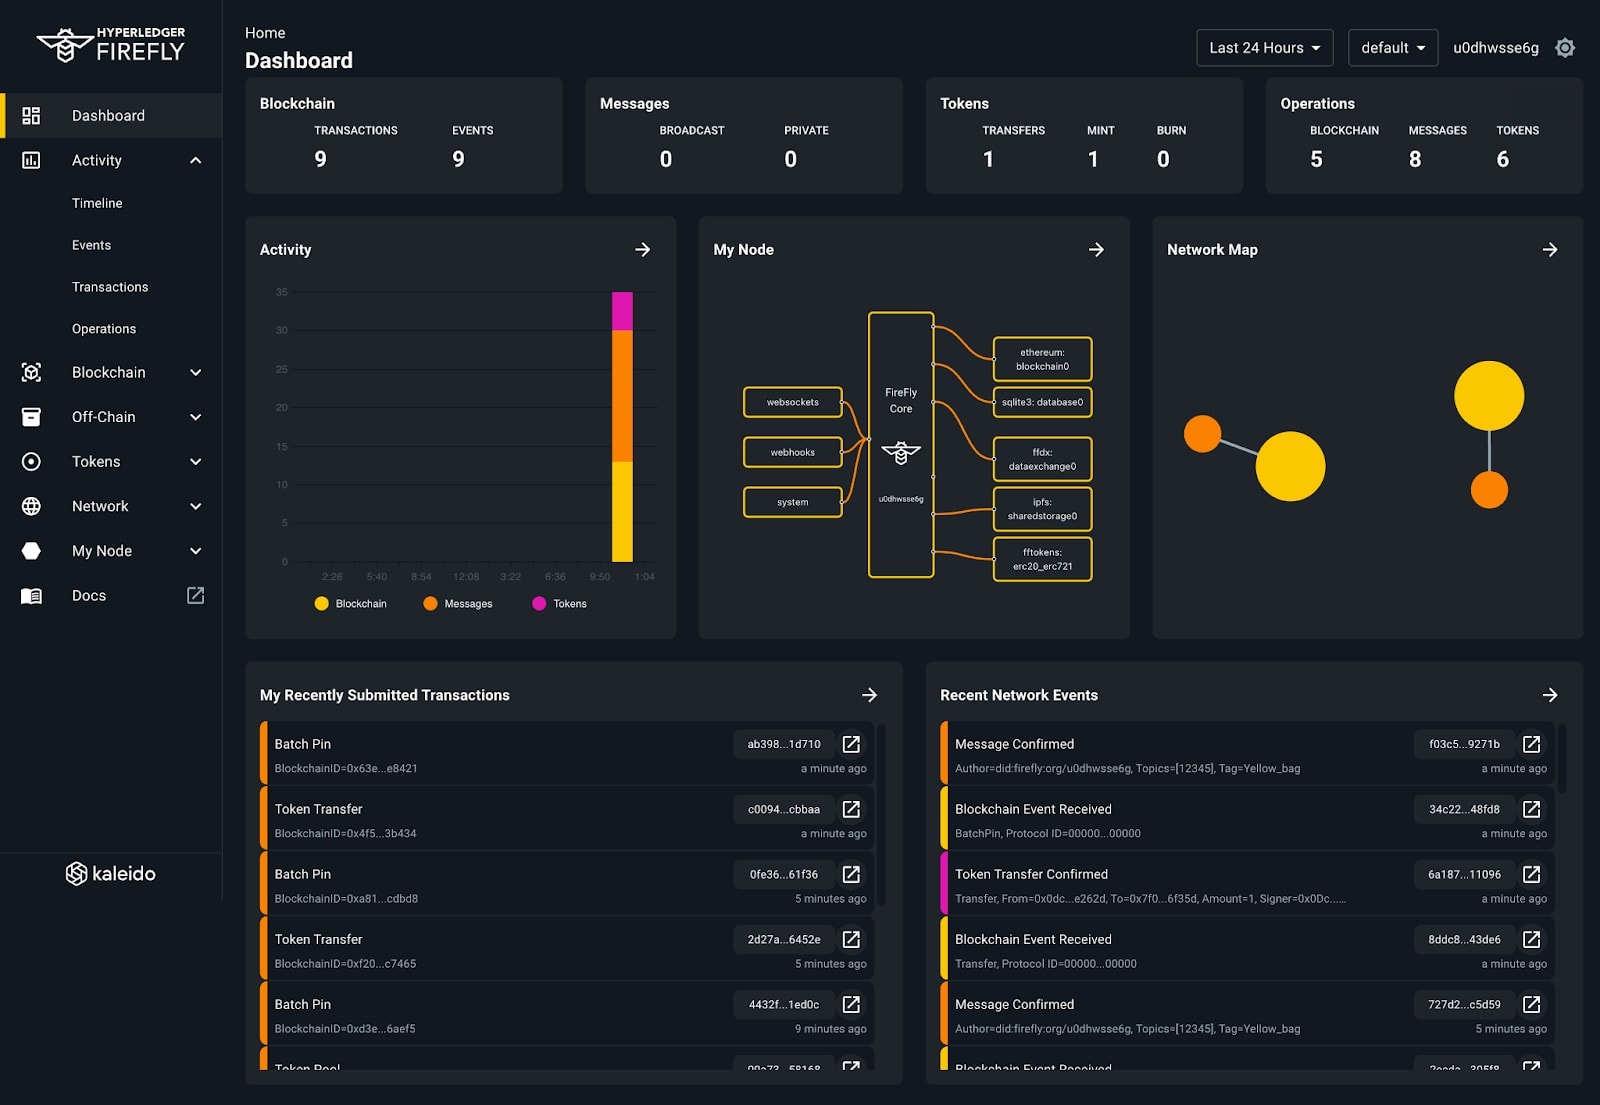
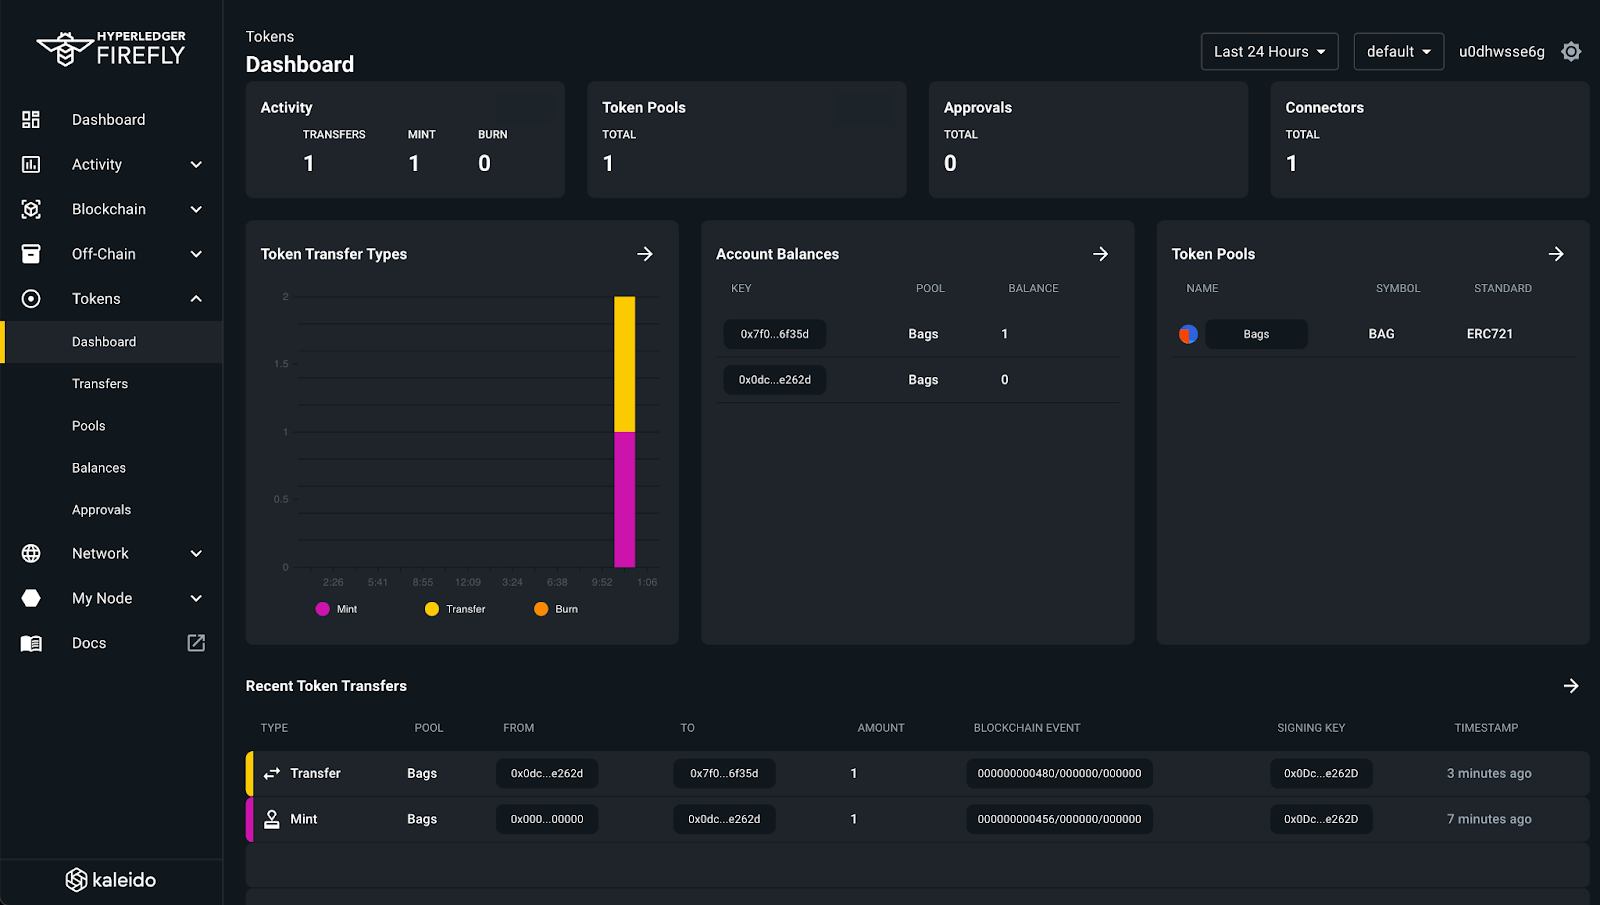
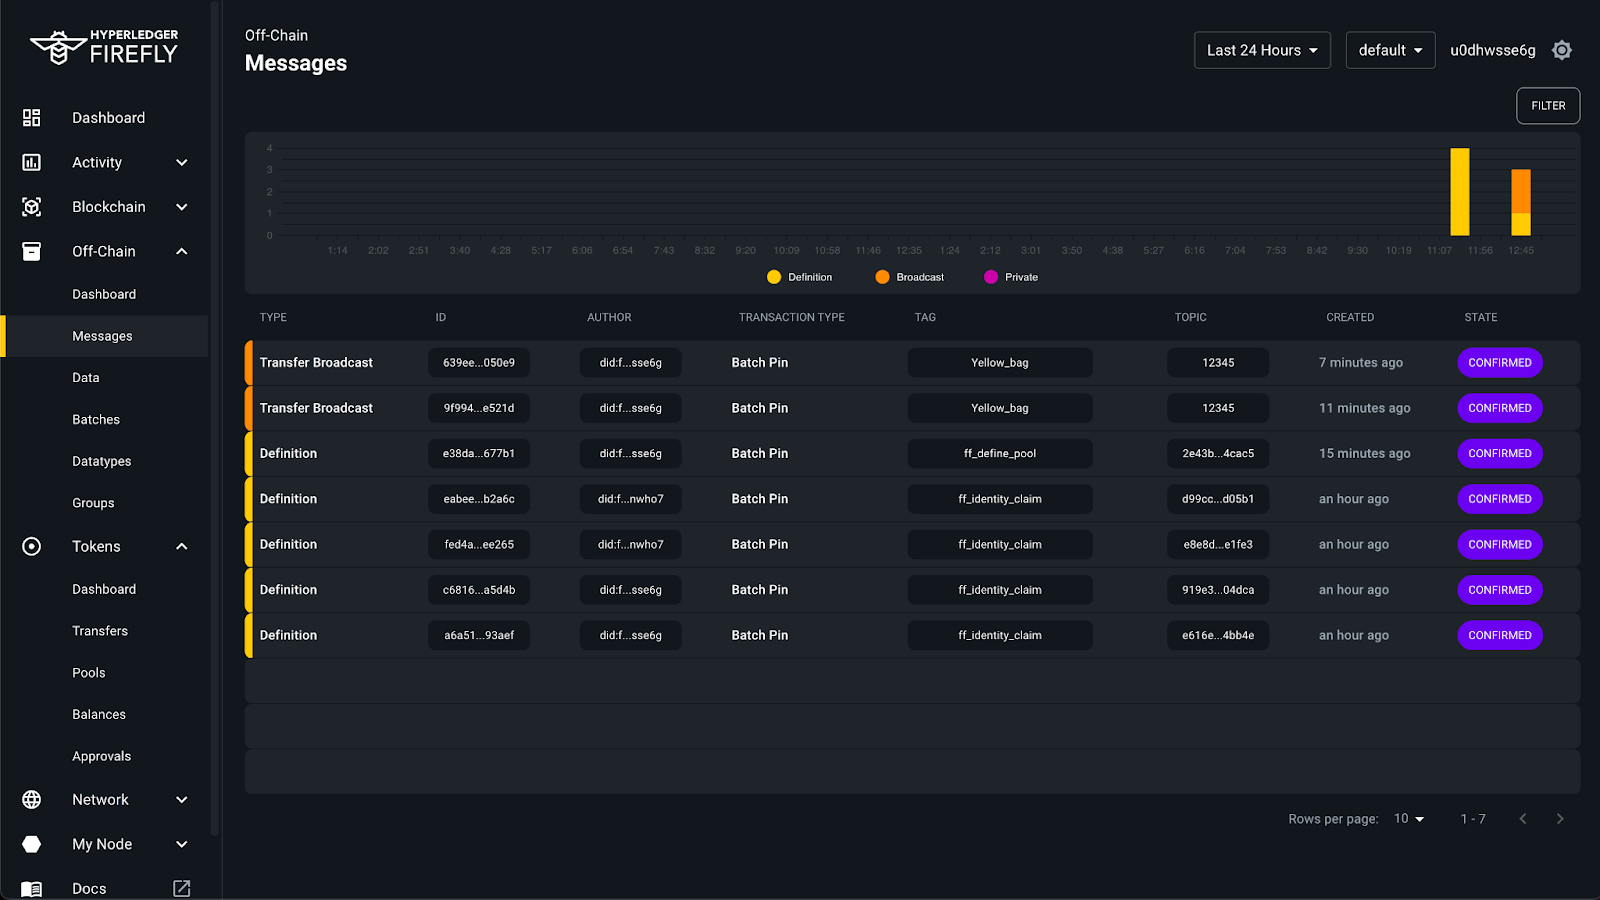
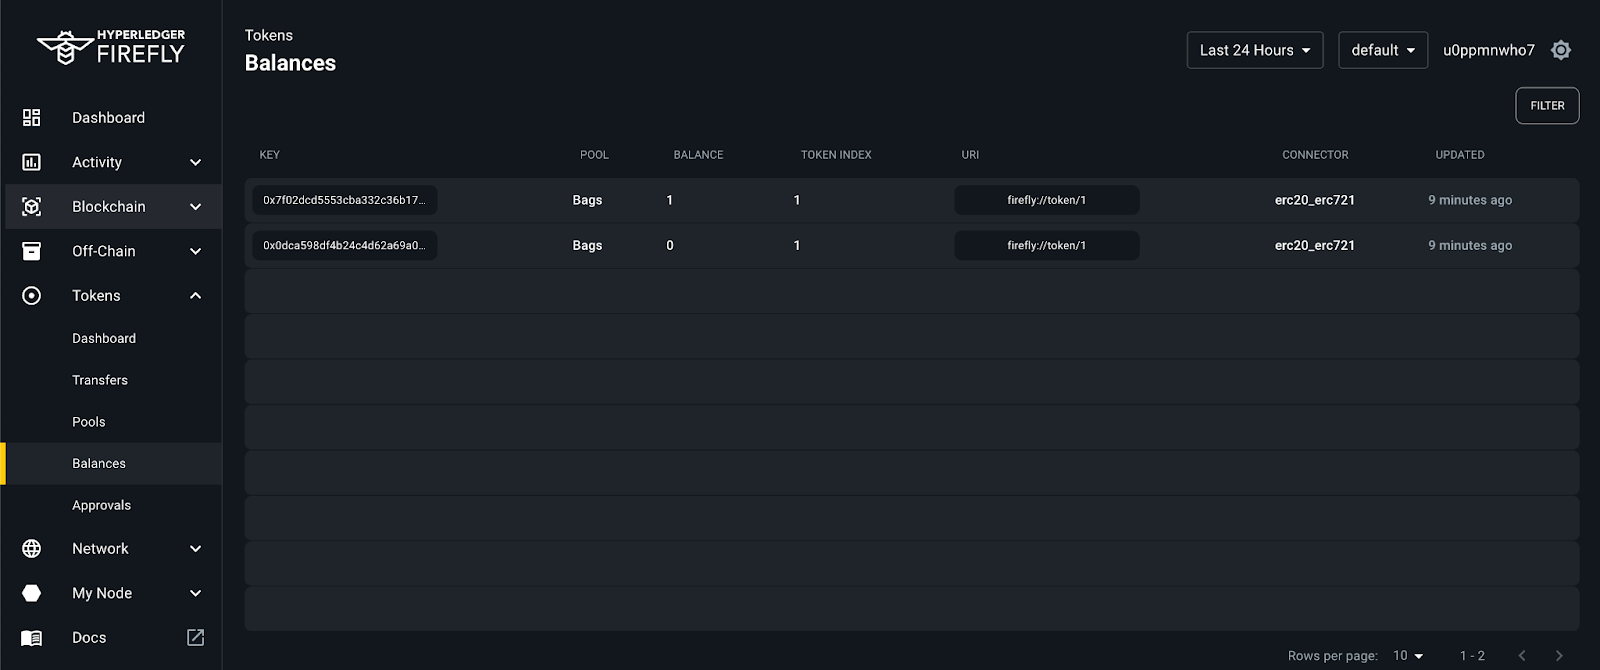
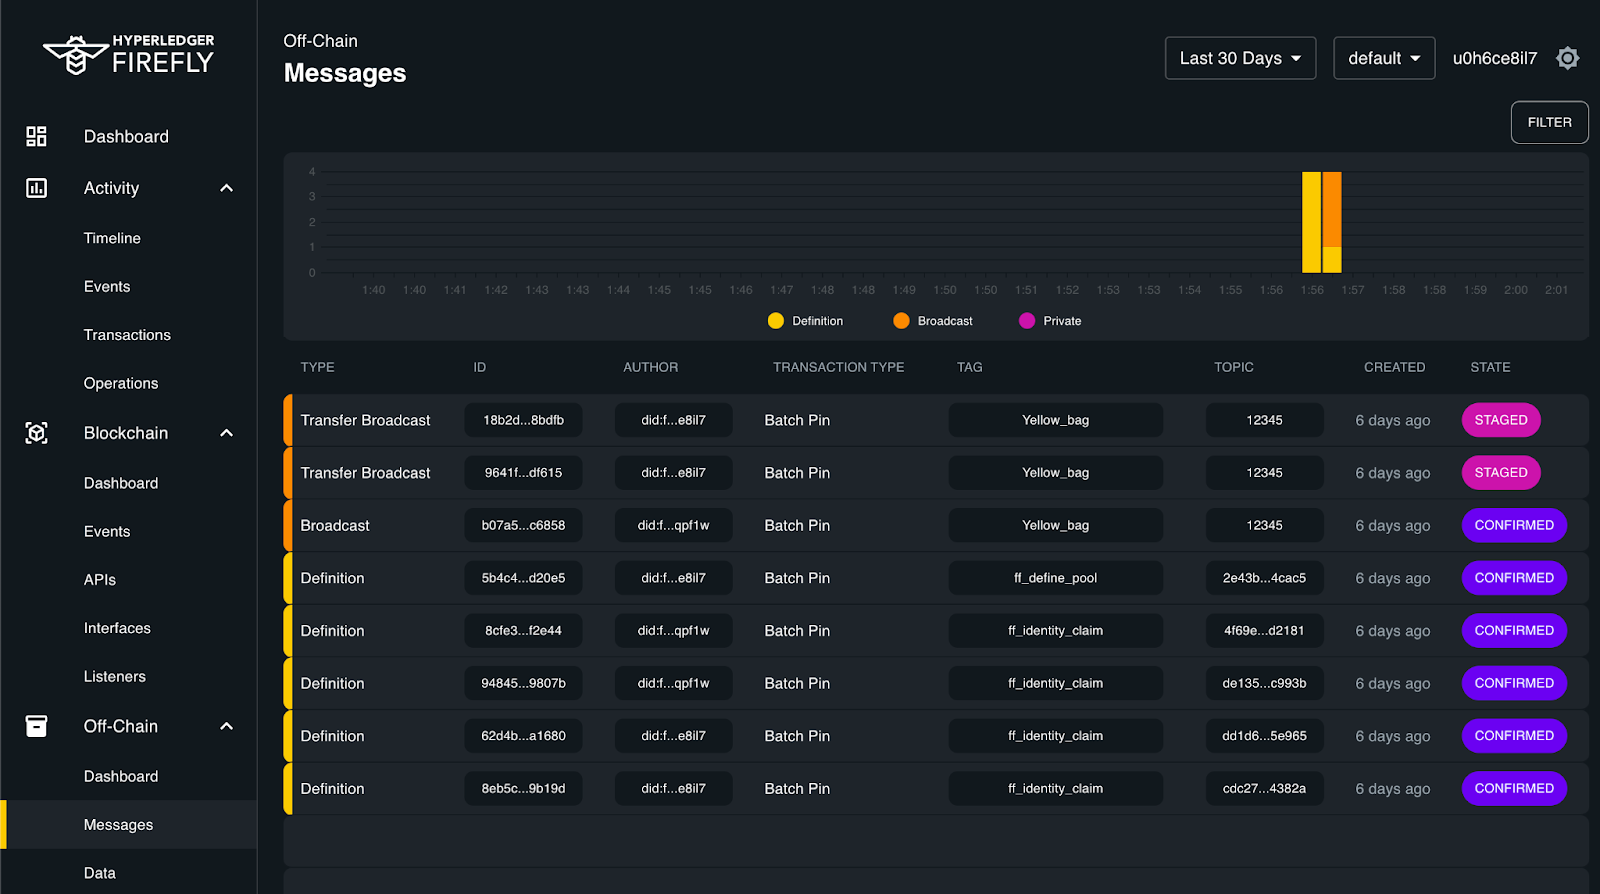
Next, switch over to the FireFly tab and click refresh. The Dashboard will show you everything that has happened so far. In Tokens > Dashboard you will see the NFT mint and transfer while in Off-Chain > Messages you will see the file image and “Bag Sent” messages by clicking on “Transfer Broadcast.”
Switch back to the Kaleido console, click the other FireFly node FF_Seller, and open its Sandbox and FireFly UI. These are unique instances tied only to FF_Seller and not FF_Manufacturer. Check the FireFly UI and you should see Seller now has received the NFT.
Switch to the Sandbox and broadcast a message that the bag has been received. Again, make sure that the tag and topic are the same as before.

Messaging is a powerful tool in FireFly as messages themselves are entirely off-chain. What this does is protect sensitive information by keeping it off-chain but having an on-chain proof that it has occurred. In this case, the NFT that is minted will forever be on-chain and tied to a hash. From those looking at on-chain transactions, this hash is indecipherable but those who have received the message off-chain would be able to see that the image of the Yellow_bag is tied to the NFT.
To check this for yourself, in your FF Explorer click on Off-Chain > Messages and you will be able to see the Yellow_bag image that you uploaded along with the “Bag Sent” and “Bag Received” messages.
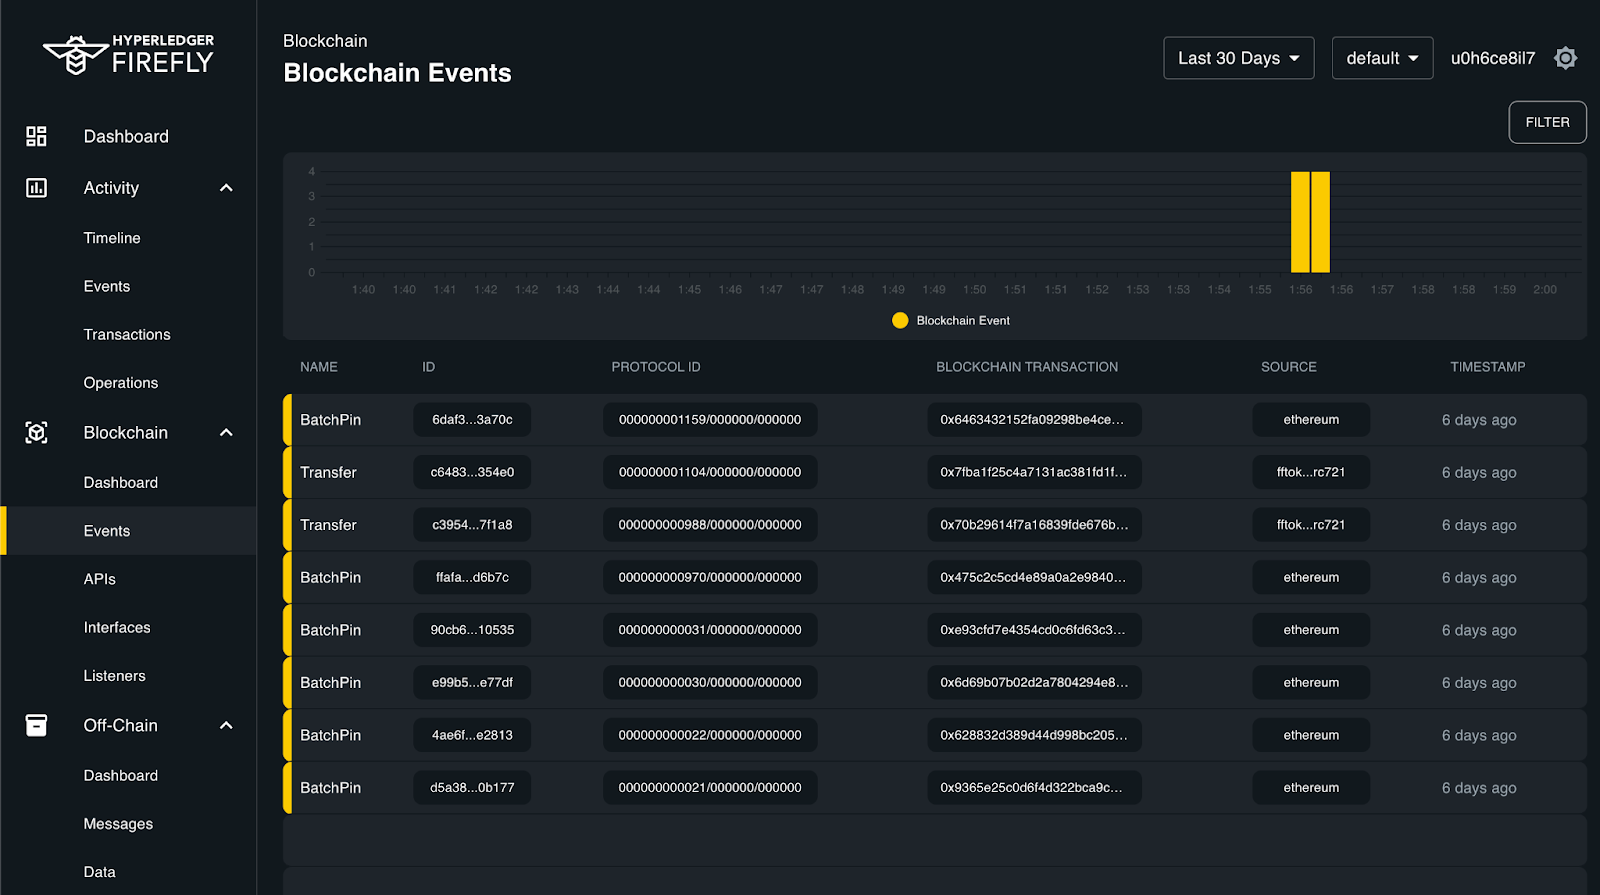
Next, click on Blockchain > Events. Here you will see that the transfer of the NFT is recorded, however, messages themselves show up as BatchPins.
Supply chain is just one of many use cases you can do on Kaleido. Be sure to check out Kaleido’s YouTube channel, blogposts, and docs for more information. You can also learn about our NFT Platform and Digital Asset Platform to see how we power asset manage and tokenization.