Creating an ERC-721 contract forms the backbone of developing unique, non-fungible tokens (NFTs) on the Ethereum blockchain.
ERC-721, a token standard interface for NFTs, enables the representation of ownership and transferability of diverse digital assets, ranging from art to real estate.
This introduction will guide you through the essentials of setting up your ERC-721 contract, including the key functionalities that distinguish ERC-721 tokensfrom other token types, the significance of metadata, and the steps involved in deploying a contract that adheres to the ERC-721 standard.
By the end of this post, you'll have a solid understanding of how to leverage smart contracts to mint and manage NFTs, ensuring your assets are both secure and compliant with Ethereum's widely recognized protocol.
The ERC-721 token standard, a distinct protocol within the Ethereum blockchain, represents a significant evolution in the realm of digital assets.
Unlike the ERC-20, which is geared towards fungible tokens (where each token is identical and interchangeable), ERC-721 introduces the concept of non-fungible tokens (NFTs). These tokens are unique and cannot be exchanged on a one-to-one basis with other tokens.
Each ERC-721 token is distinct, possessing specific attributes and characteristics that set it apart from others. This uniqueness makes ERC-721 ideal for representing one-of-a-kind assets like digital art, collectibles, and ownership rights in the virtual world.
Essentially, ERC-721 tokens can be thought of as digital certificates of authenticity and ownership for virtual or real-world items.
The introduction of the ERC-721 standard has been a game-changer, particularly in the digital art and collectibles space. It allows for the creation and exchange of NFTs on the Ethereum blockchain, offering a secure and verifiable way to establish and transfer ownership of digital items.
This has opened up new avenues for artists, collectors, and investors, enabling a thriving marketplace for unique digital assets. ERC-721 has thus played a pivotal role in the burgeoning field of digital collectibles, contributing significantly to the mainstream acceptance and popularity of NFTs.
If you haven’t already, sign up for a Kaleido account here. Create an account and password and you will be all set. ERC-721 tokens can be created with any plan on Kaleido, starter tier (free) included!
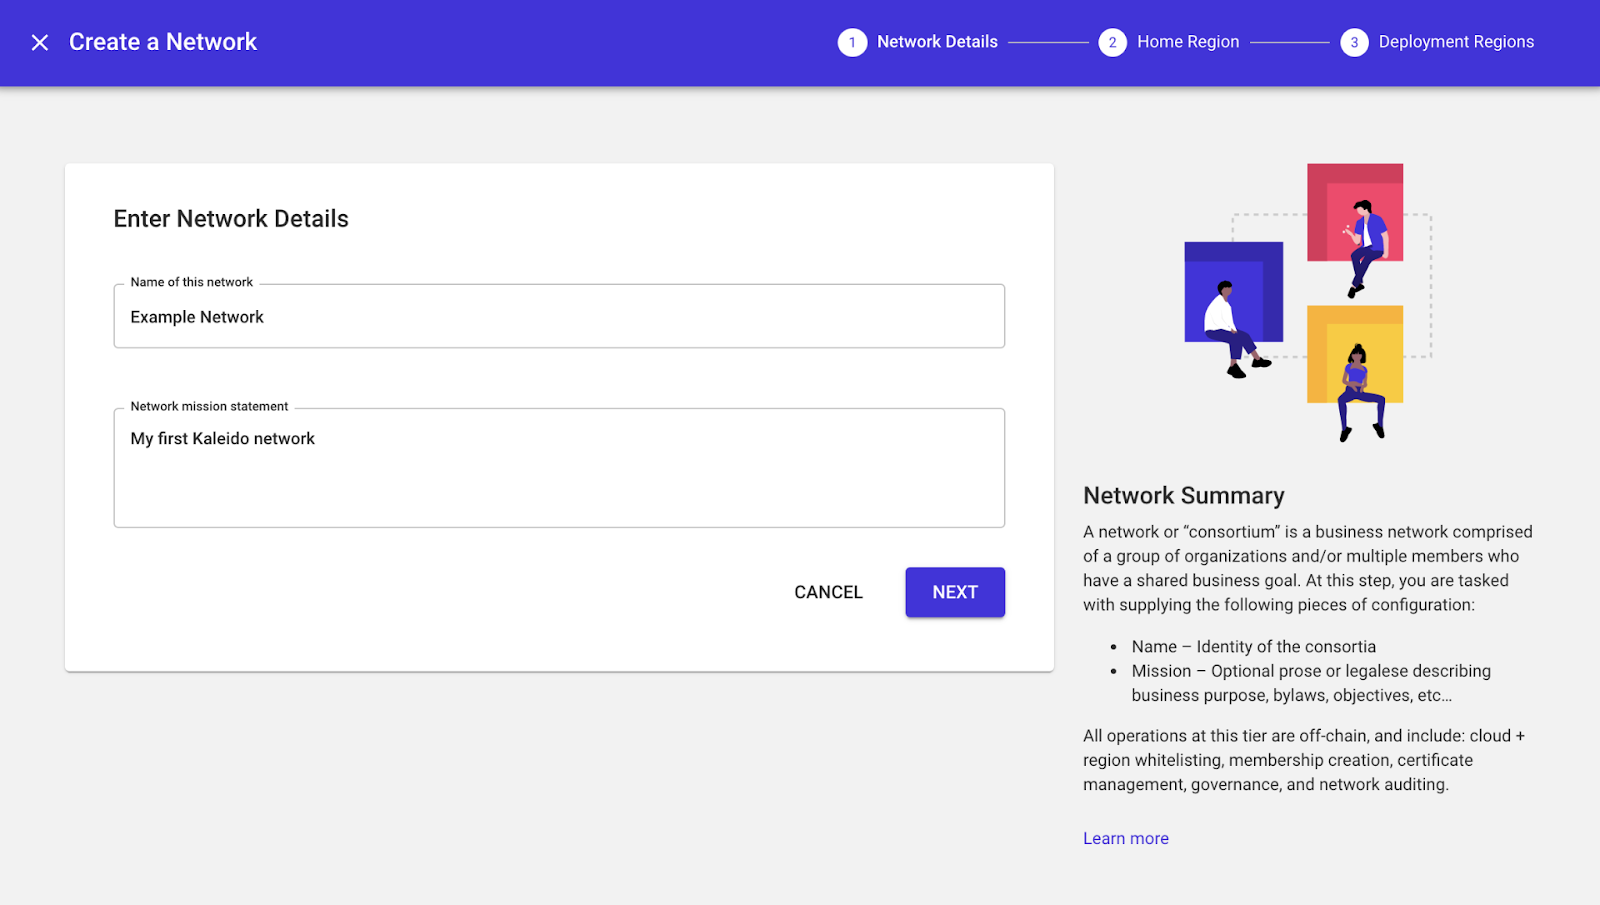
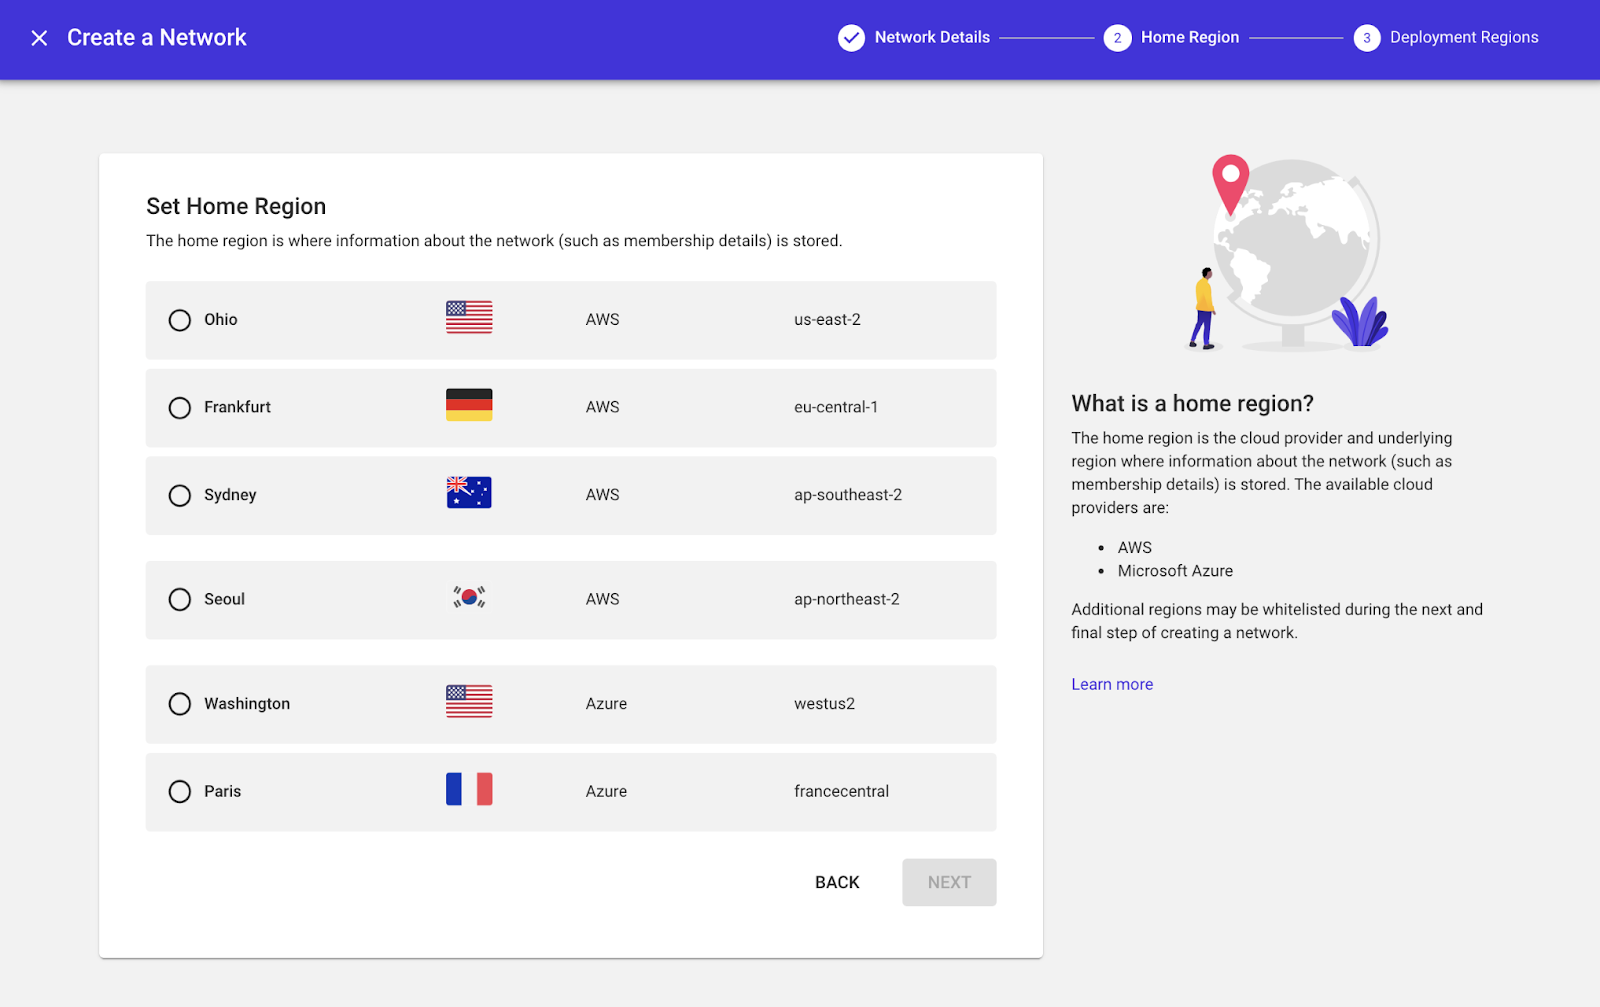
To get started, create a blockchain network. You will need to name your network and select deployment region(s). This is where your resources will be hosted and there are various options for AWS and Microsoft Azure.
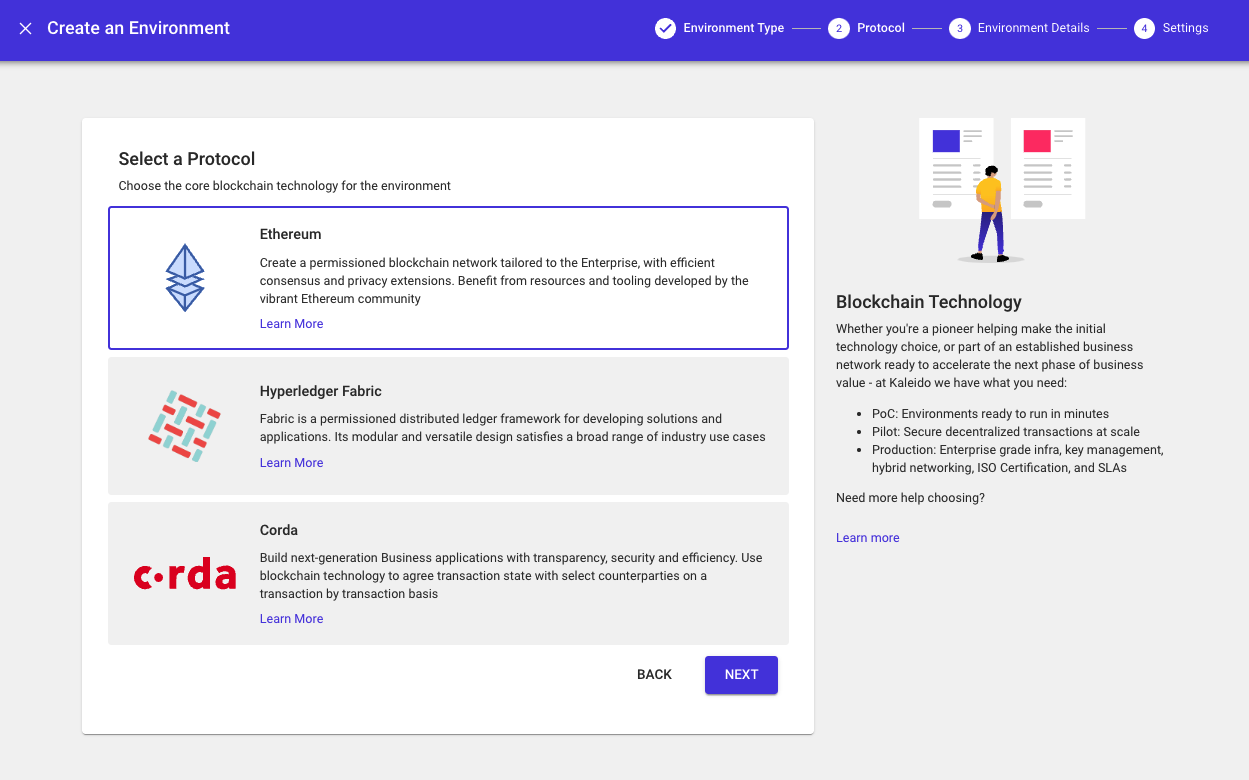
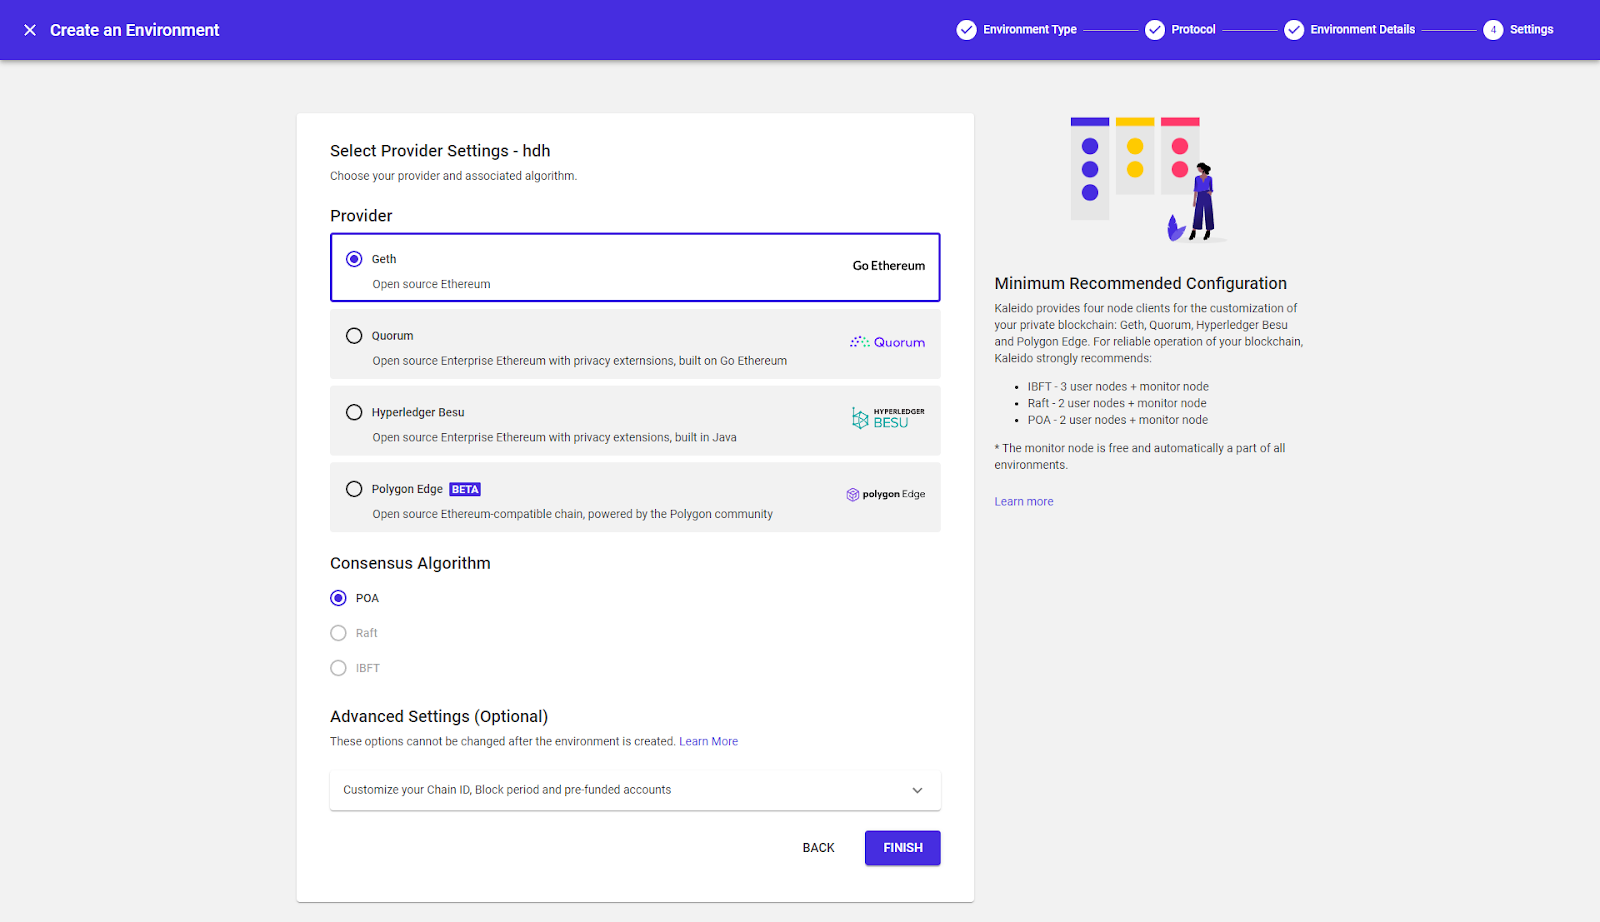
After your network is created you will need to create an environment. There are options for different protocols, however, to create an ERC-721 make sure you create an “Ethereum” one. You will also need to select a provider.
For our purposes any will do but if you are curious about the differences here is a technical overview.
You’re almost there. Once your environment is created, set up a node and leave the default configurations of “small” and “signer” on the final panel.
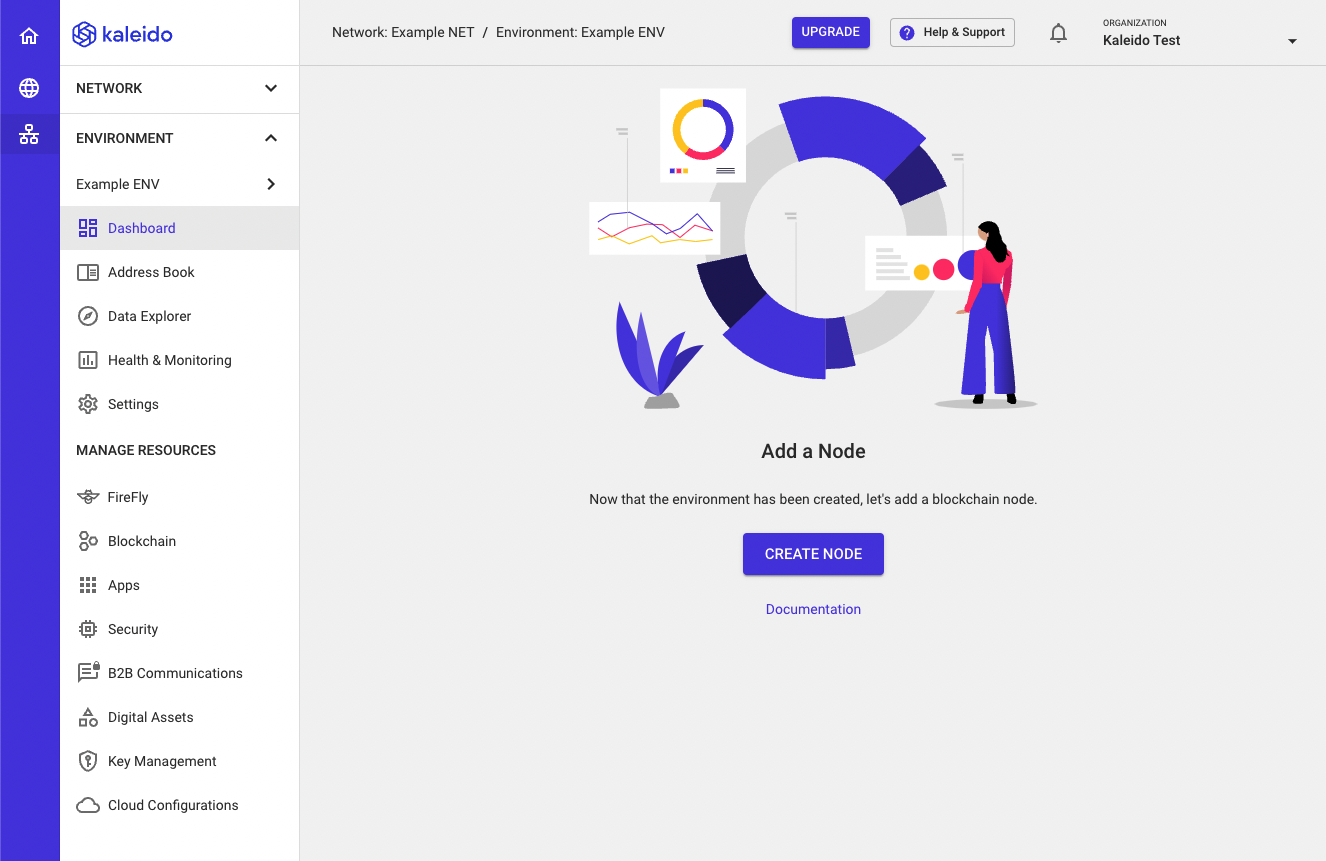
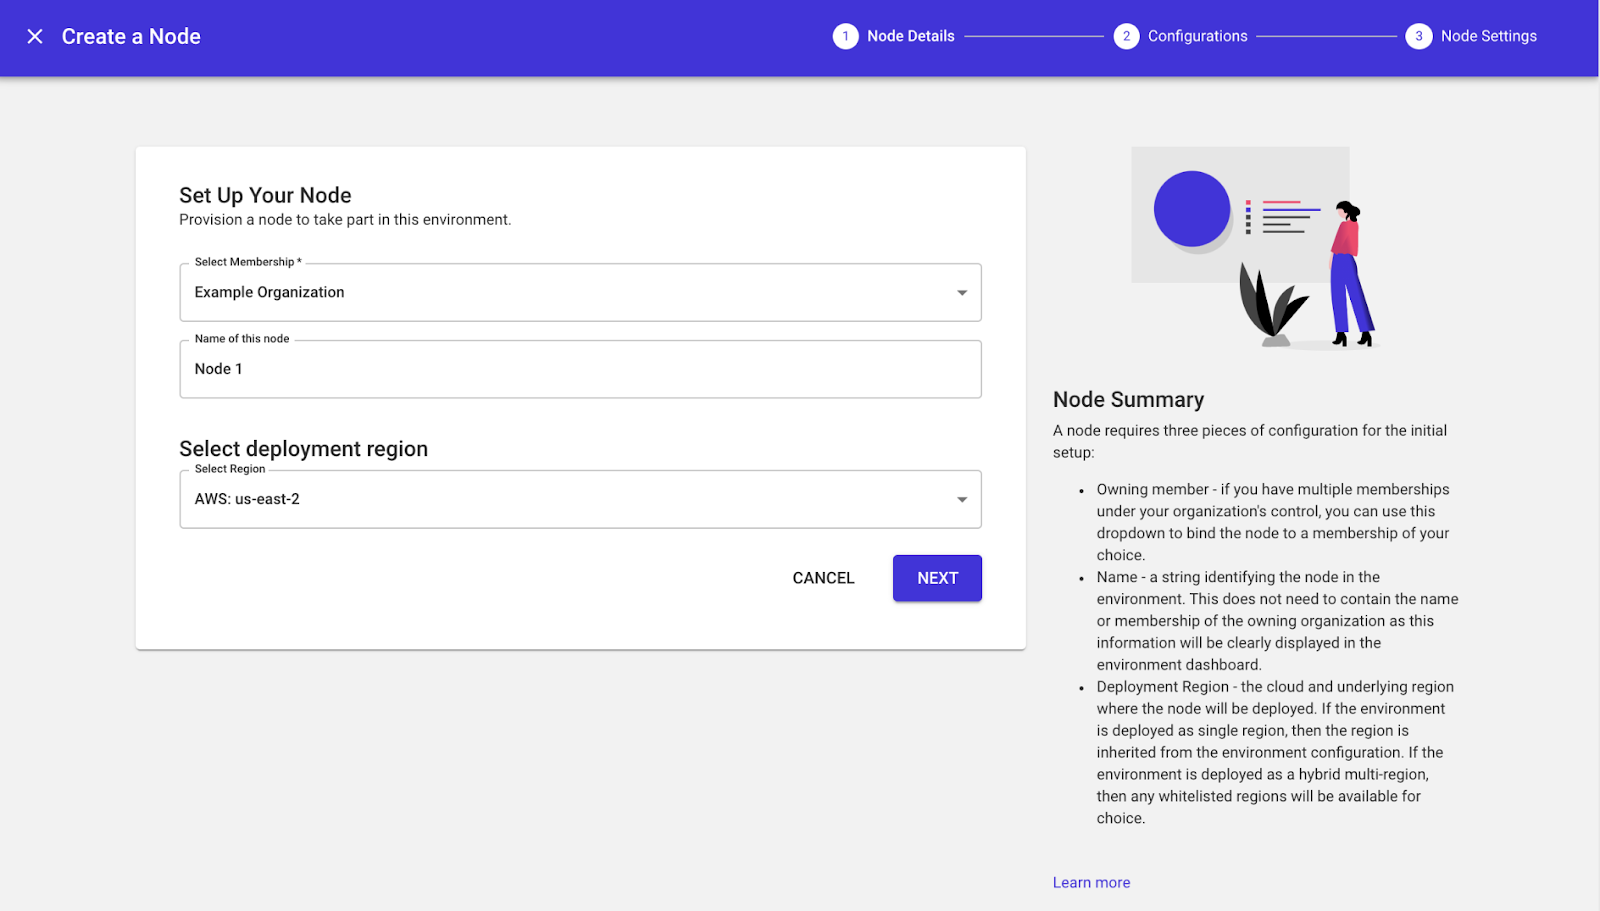
Now that your blockchain network is created, navigate to the “digital assets” selection in the left panel and click “tokens”. Select the Signing Account as the node you created in the previous step which will be used to deploy the token contract to the blockchain and create using our Token Factory.
Make sure to select either KaleidoERC721Mintable or KaleidoERC721MintableBurnable.
Next, give your token a name and symbol and click “deploy token instance”.

Now that you have deployed a ERC721 contract, the next step is to mint your token. Go back to the left navigation and click on “tokens”. You should now see your created token, or NFT. In the top right, click “select signing account” and pick the same account you used to create your NFT.
Next click mint, give your token an unique numerical ID, and token URI if applicable.

The token URI is used to point to a unique image for the NFT which contains metadata (example below).
{
"name": "NFTexample",
"description": "Example of a NFT",
"image": "https://example.com/NFTexample.png",
"attributes": [
{
"trait_type": "ease_of_use",
"value": 100
}
]
}
The URI is optional but recommended and more information can be found here.
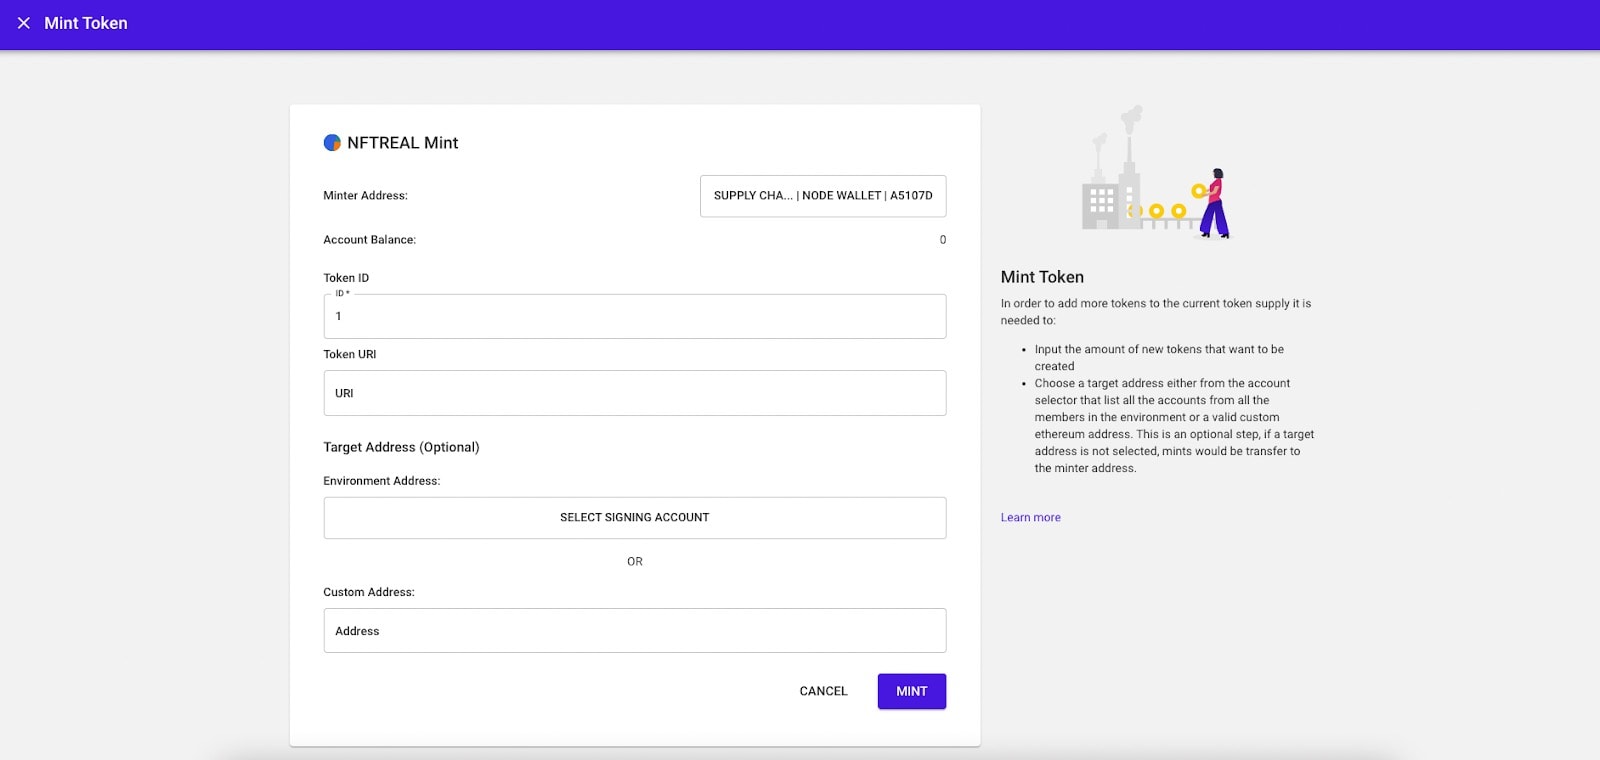
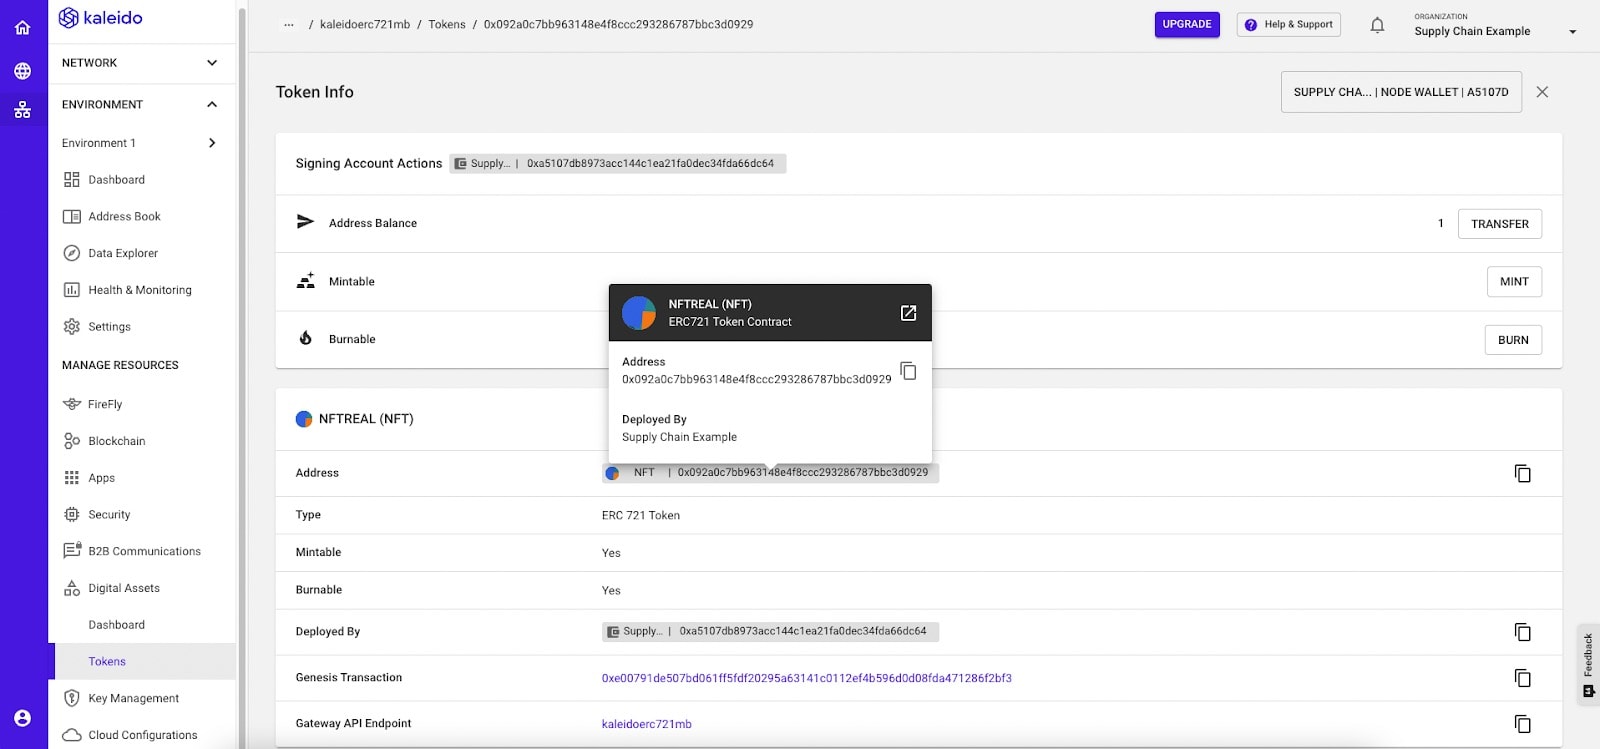
After creating your ERC721 token, click on the Digital Assets tab on the left nav and select Token. From there deploy the contract if you haven’t already. Once the contract is deployed, click into the details to see a screen like below:

Select your signing account and the MINT button should become clickable. Click “Mint” and you will be given prompts to enter the Token ID, URI, and optional target address.
For token ID you may assign any numerical digit but keep in mind that each NFT that is minted needs to have a unique Token ID.
This means the same token contract cannot have two NFTs with Token IDs of 1. For this example, we will give the Token ID a value of 1. Click the Mint button and you should see a successful mint pop up.

Click the x in the top left and you should see that the Address Button has now updated to 1 with the account address. Congratulations you have now minted your first NFT!
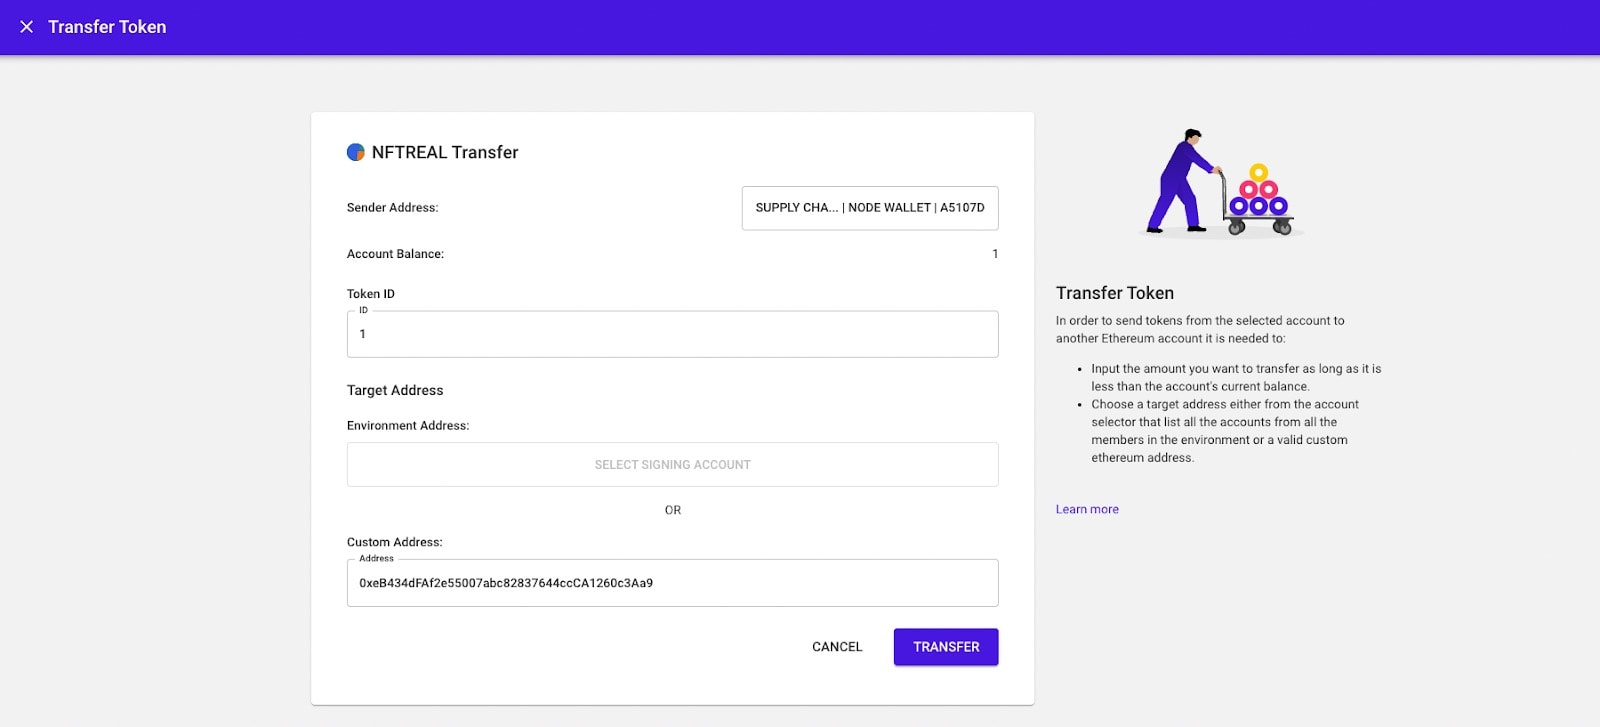
In the same screen click the Transfer button.

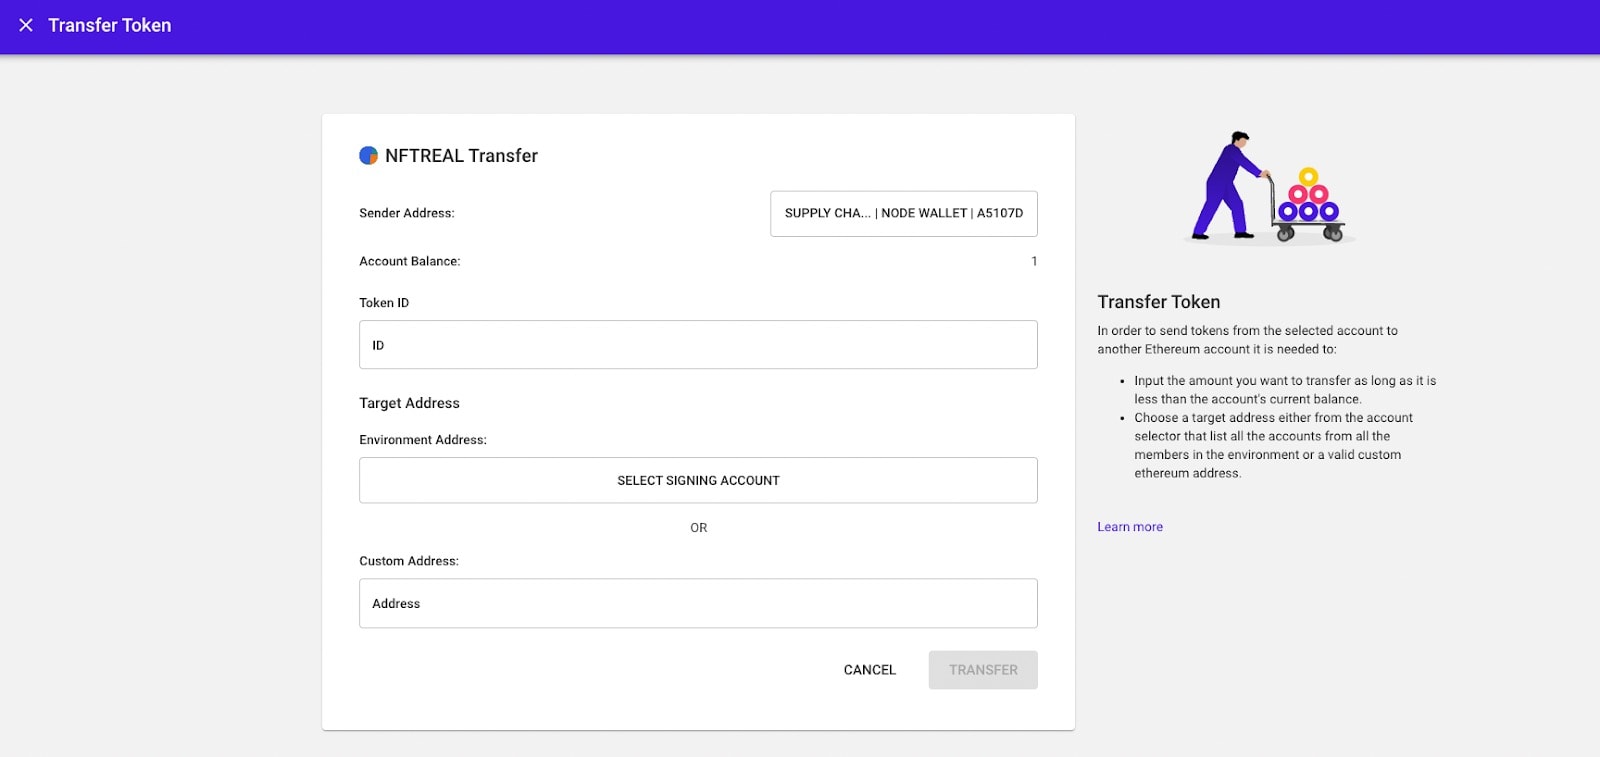
You may either provide an address from your blockchain environment or a custom address. To get another address in your blockchain environment simply create a second node. In this tutorial we will show how to get your token into Metamask.
If you haven’t setup a Metamask wallet before, this guide will help you make one.
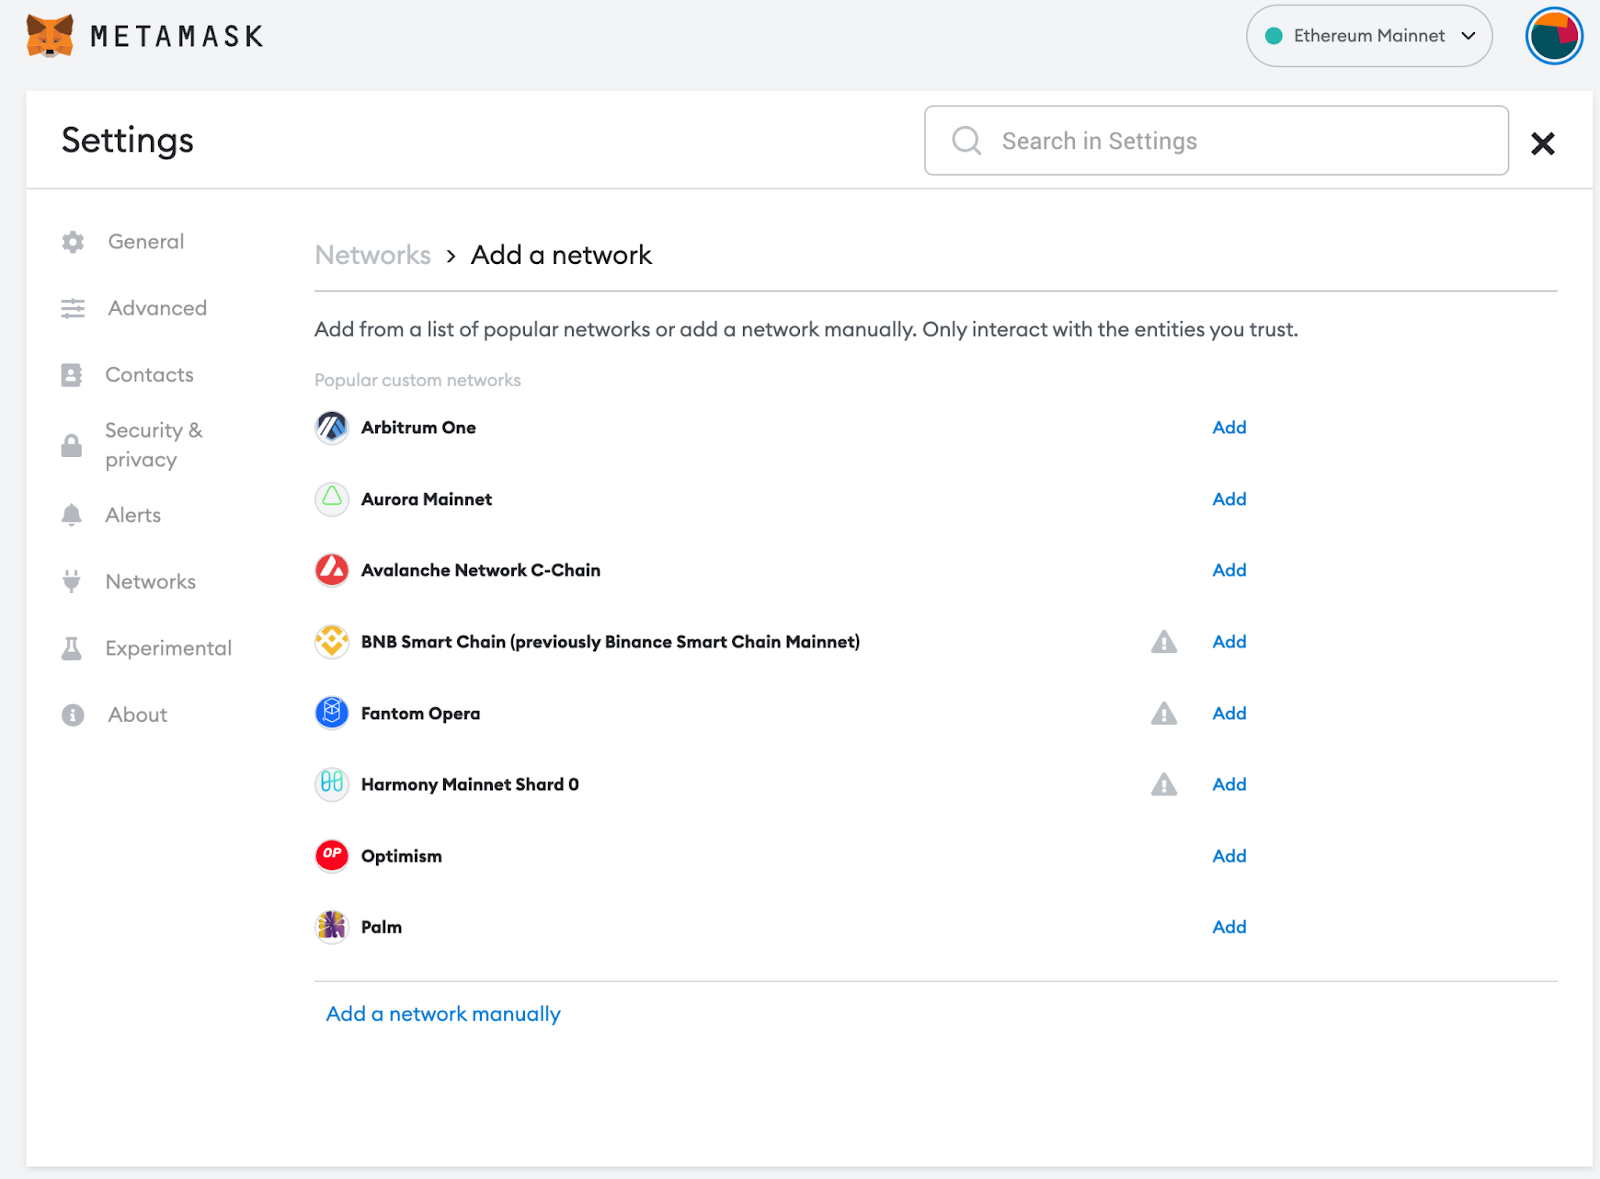
In your Metamask account, click the networks dropdown and click “Add Network.”
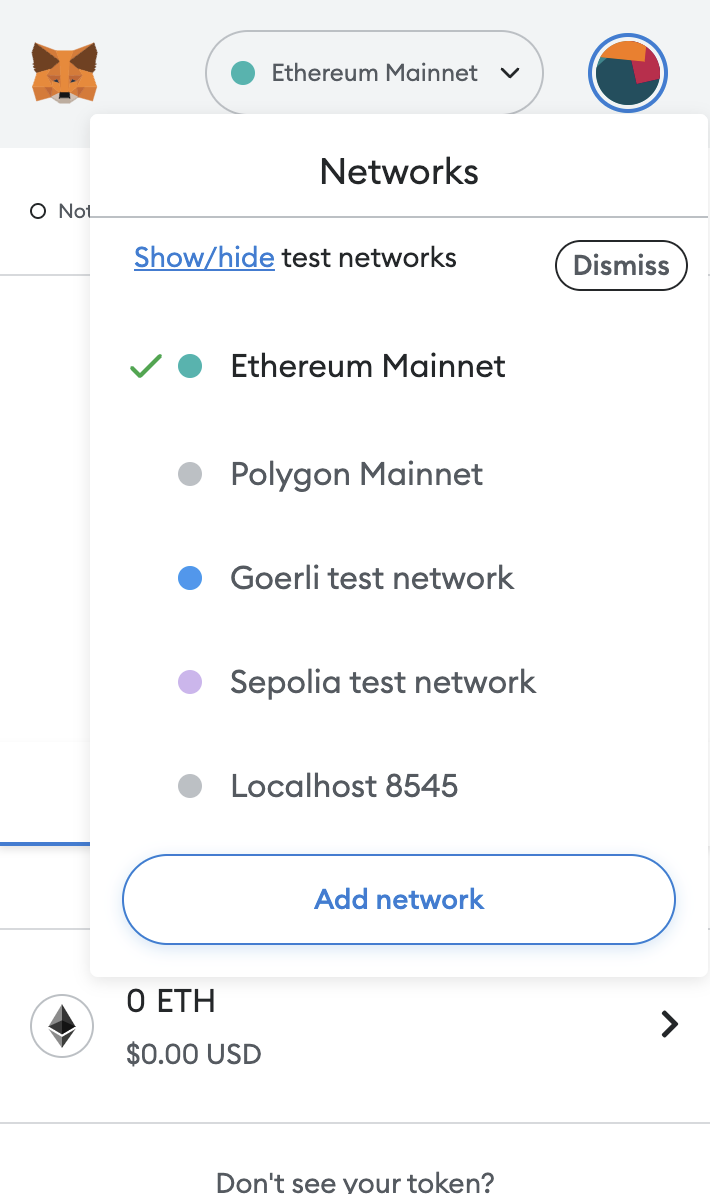
This will bring you to your Metamask settings screen where you will need to “Add a network manually”.
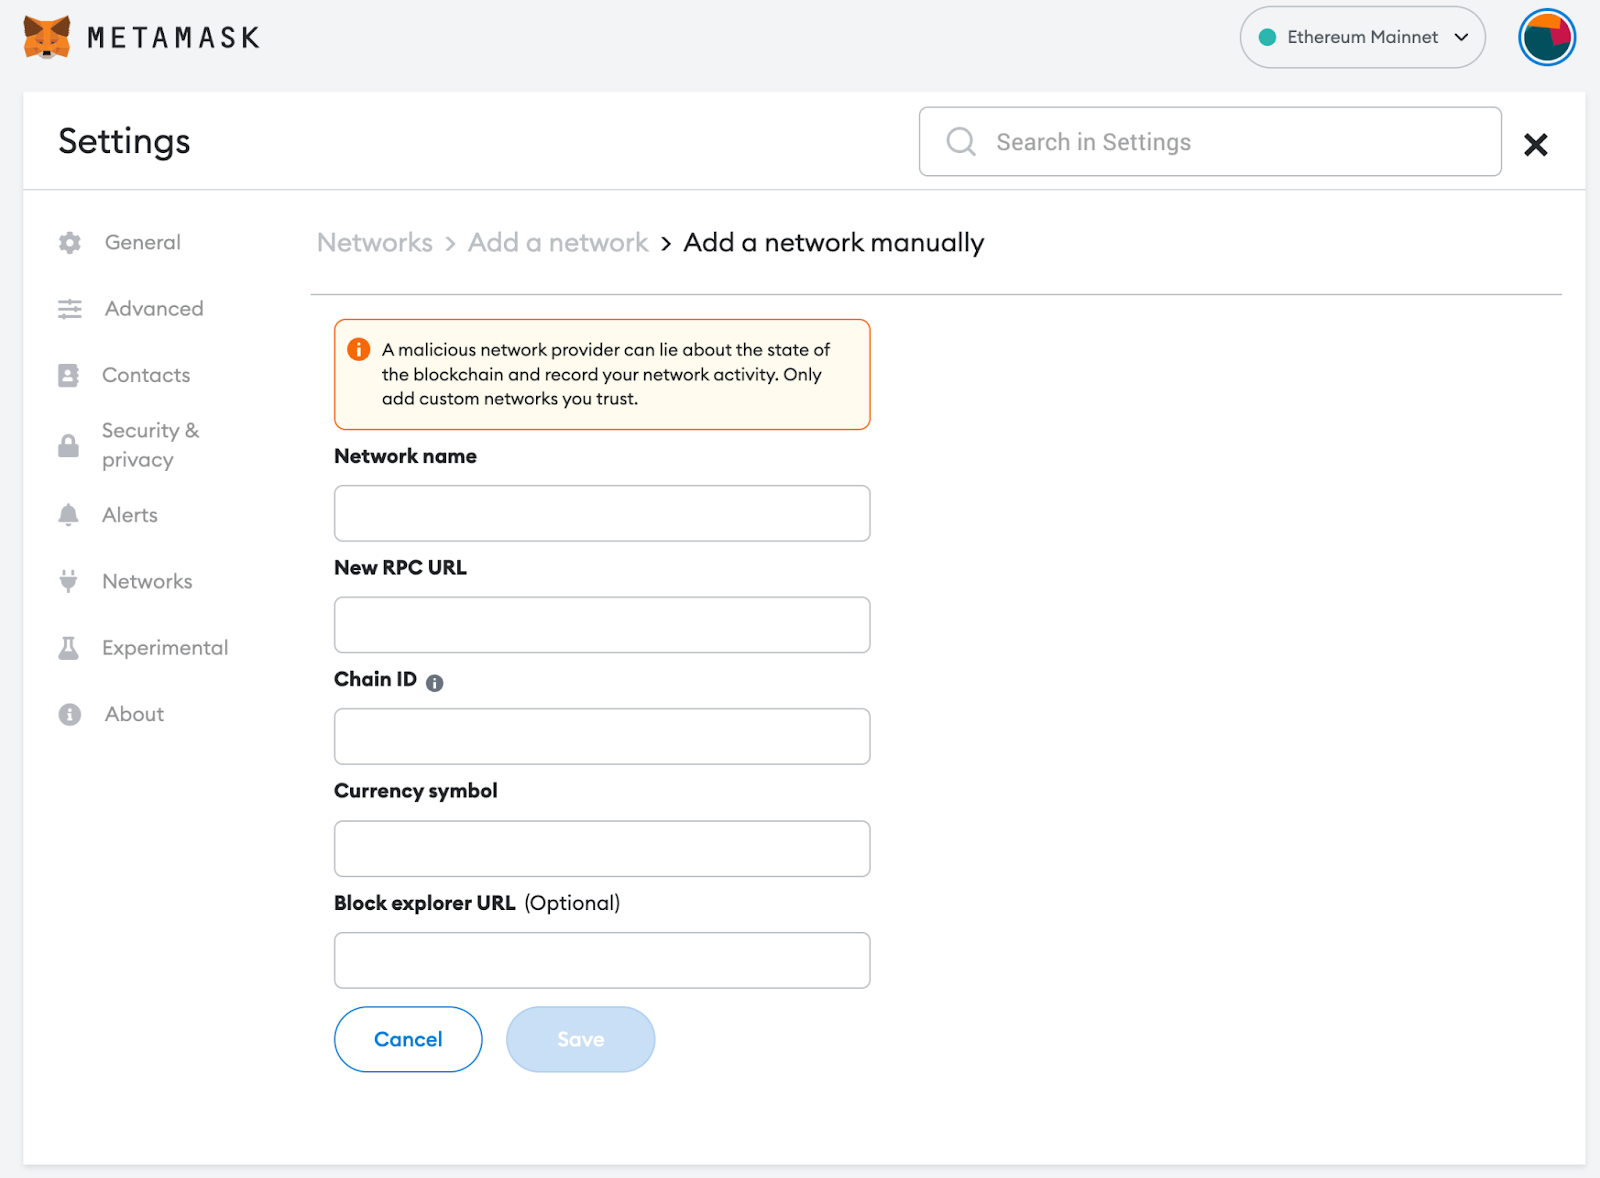
For Network name, you may name this anything. To get the RPC URL and Chain ID, navigate back to your Kaleido console and go to the Blockchain section. On the Blockchain dashboard select “View Node” for your node.
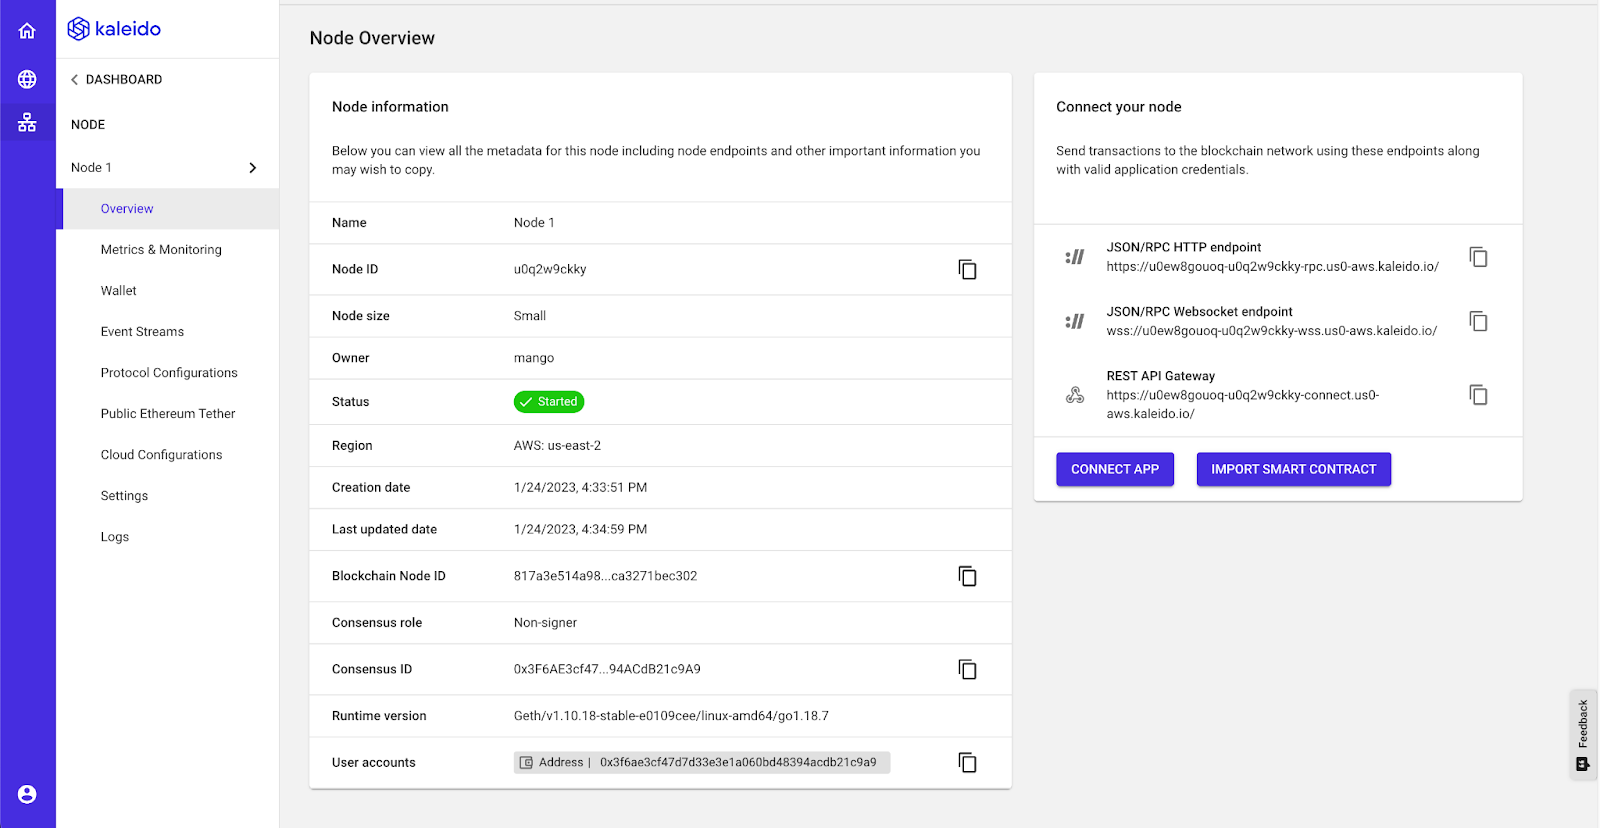
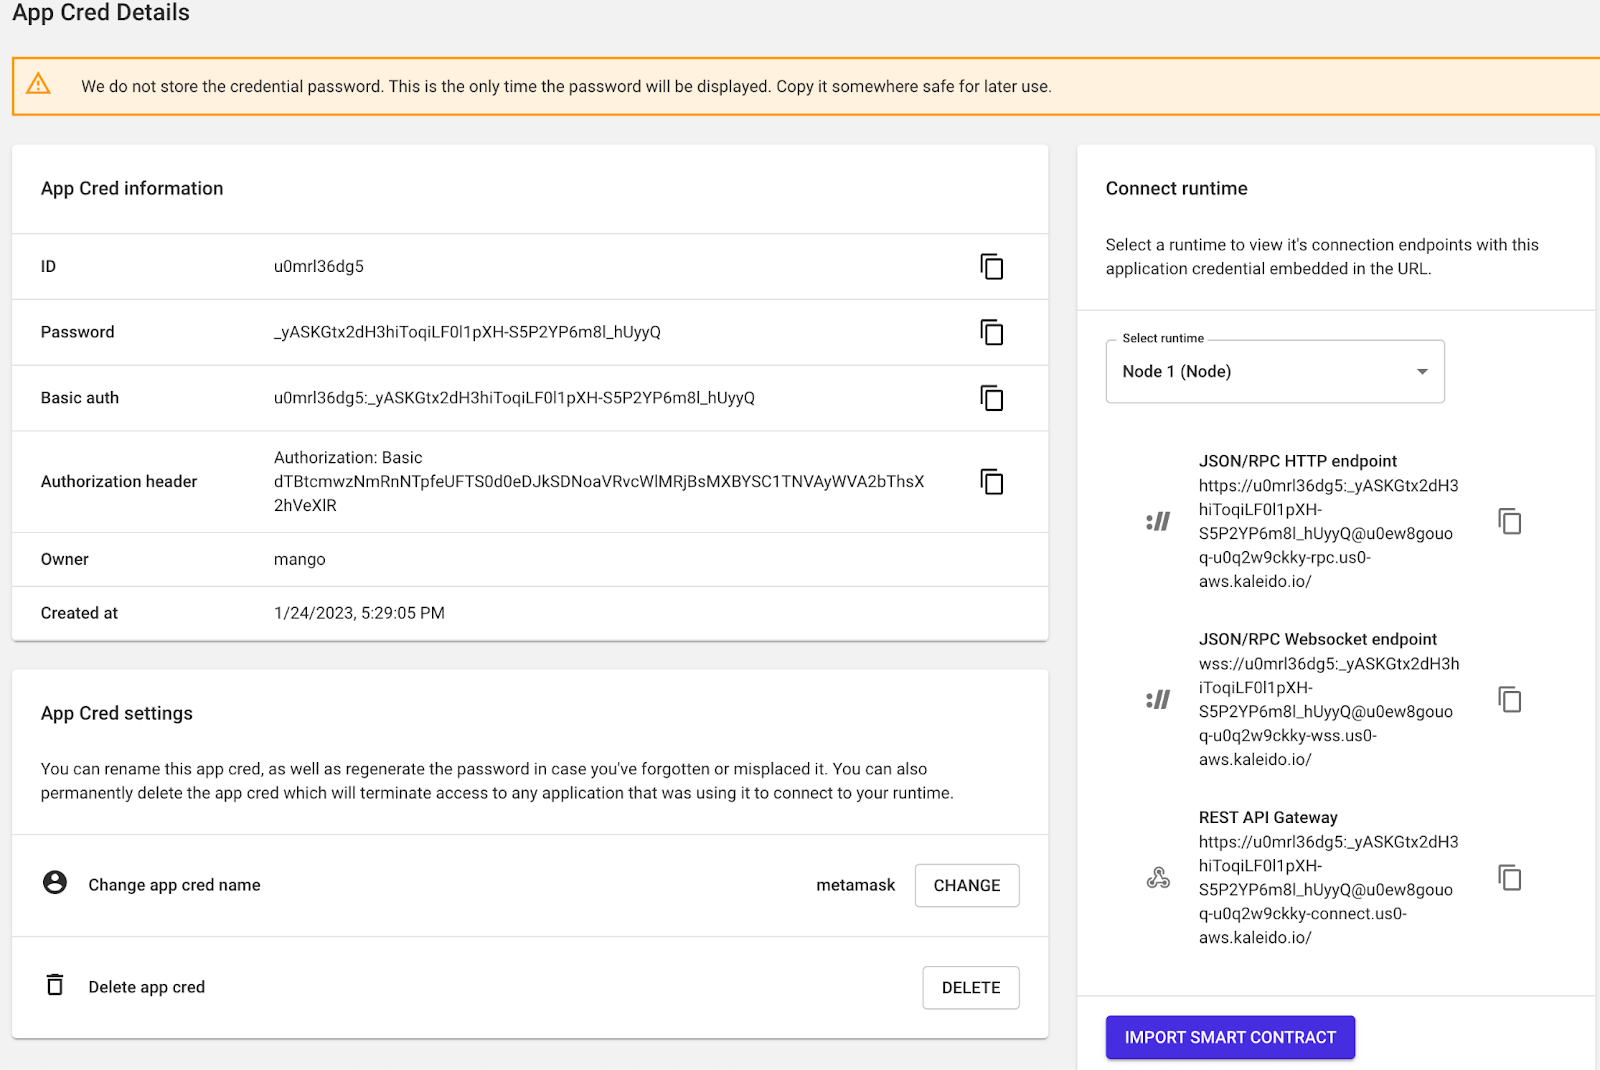
Then click Connect App and create a new app cred called “metamask”. The RPC URL will be listed under JSON/RPC HTTP endpoint. Copy this value into Metamask.
To get your Chain ID, click on the Settings section. Your Chain ID will be under Environment Info.

Once you have all the information click save in the Metamask settings.

Next, click “Import tokens” which should prompt you for the token address. The token address may be found in the Tokens section under Token Info.

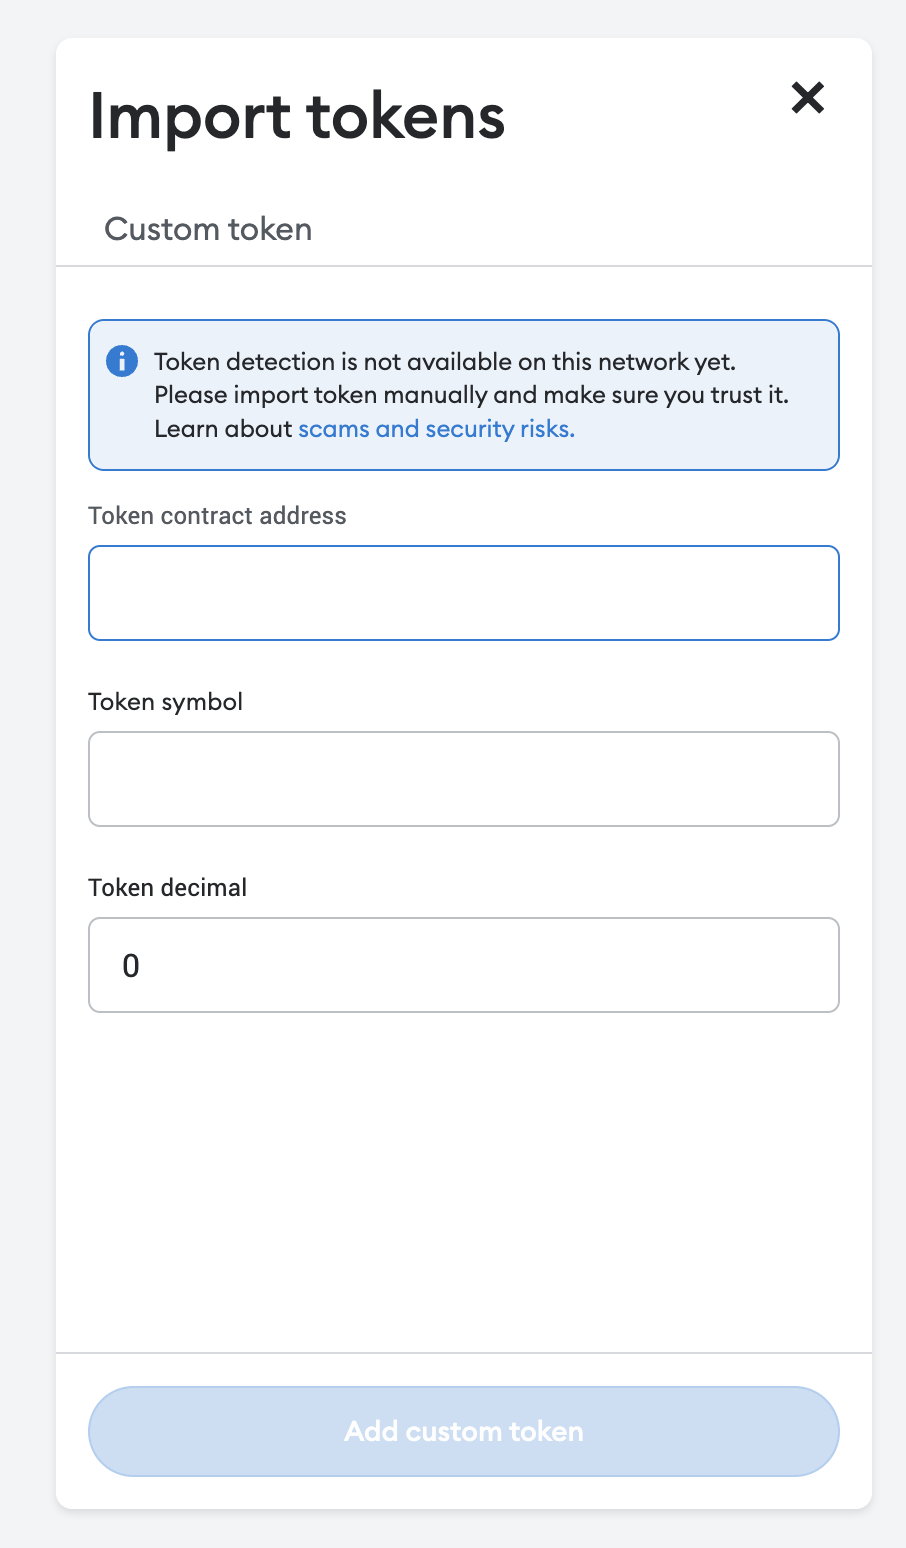
Copy this value and your token symbol and decimals should auto-populate. Finally, transfer tokens to your Metamask account by copying your Metamask wallet address.

Select an amount to transfer which will be 1 and the Token ID will be the value you had entered in the previous step. Then click Transfer. Once you get a “Successful Transaction” message go back to your Metamask wallet.
Refresh and your balance should now appear.

The ERC-721 standard specifies a set of core functions that enable the creation, transfer, and management of non-fungible tokens (NFTs) on the Ethereum blockchain. These functions are essential for ensuring the uniqueness of each token and enabling the secure transfer and ownership verification of NFTs. Here are the core functions defined by the ERC-721 standard:
Additionally, ERC-721 defines two key events:
These functions and events ensure the standardization of NFT operations across various applications, enabling interoperability and providing a consistent framework for developers to build upon.
Minting a NFT is just one of many things you can do using Kaleido. Be sure to check out Kaleido’s YouTube channel, blogposts, and docs for more information and other tutorials about how to use the platform.
Launch custom NFT ecosystems quickly and easily with Kaleido
Try FreeLaunch custom NFT ecosystems quickly and easily with Kaleido
Try Free