We've written a guide about how to build a blockchain using our platform, and that piece outlined all the chain options Kaleido offers. It included steps to set up an account and how to build your network. In this piece, we're going to talk specifically about the Hyperledger Fabric protocol.
Our team includes founding members of Hyperledger Fabric, plus long time committers and maintainers, which makes us uniquely qualified to help enterprise developers build blockchains on the protocol. We also serve on the technical steering committee for Hyperledger and are significant contributors to not only Fabric, but Hyperledger FireFly as well—so it's a protocol we know really well. Let's jump in.
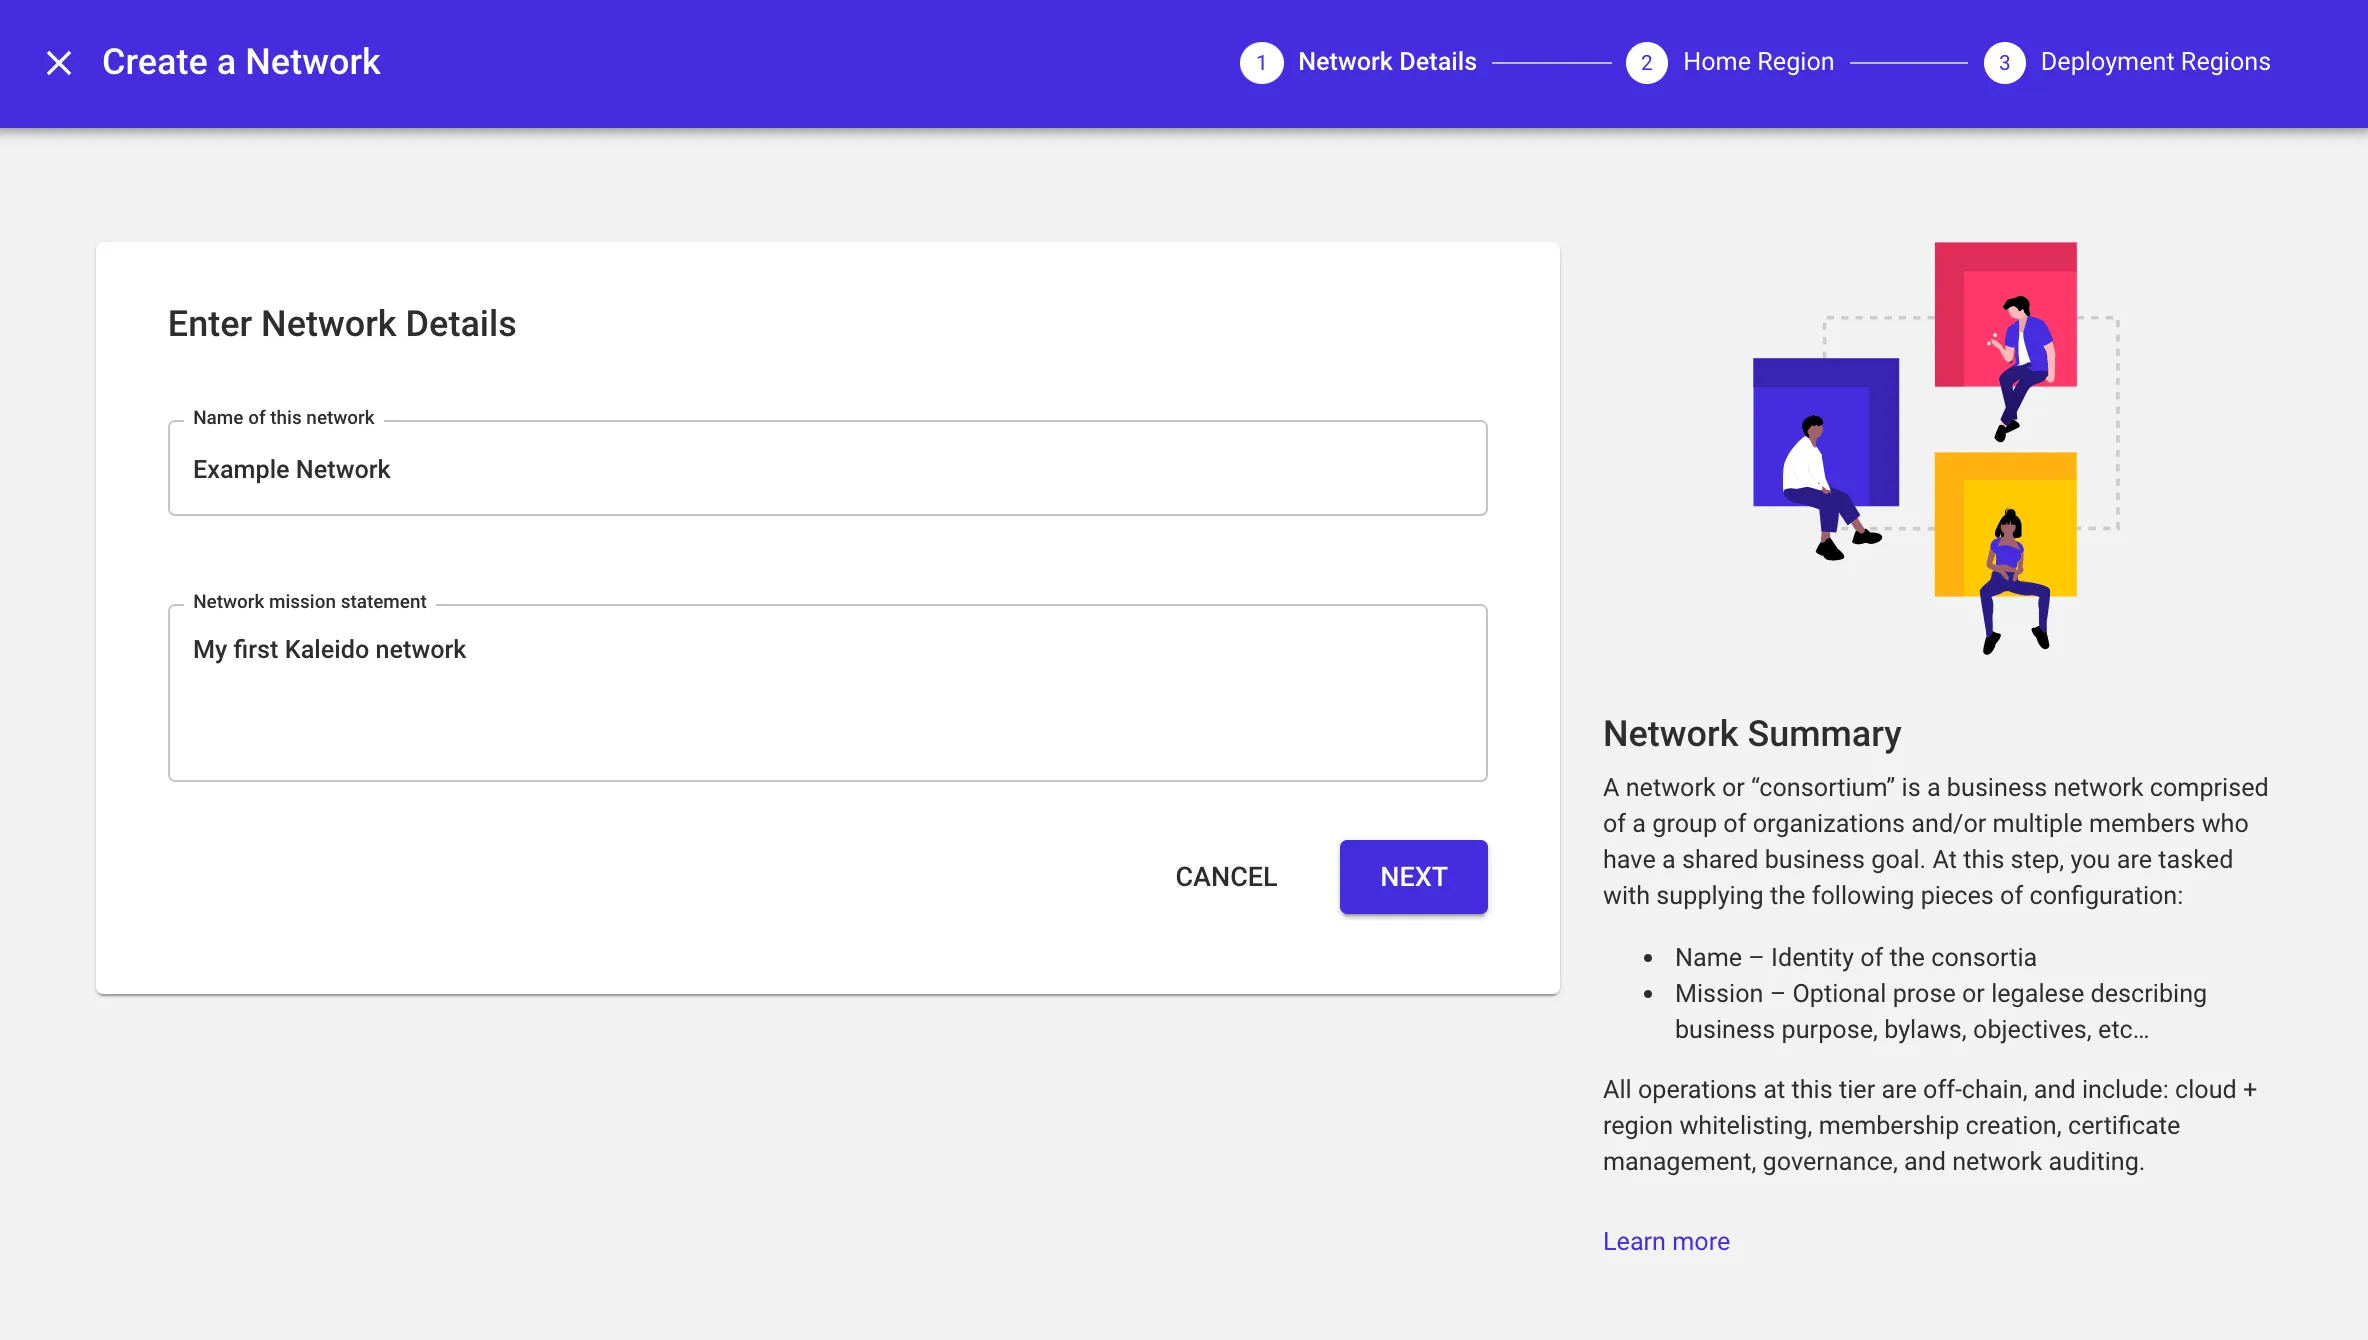
Once you've created a free account on Kaleido, you can start building a blockchain. Kaleido supports Enterprise Ethereum, Corda, and Hyperledger Fabric as standard blockchain protocol providers, as well as a multi-party orchestration framework called FireFly. We've also added a number of different chain configuarations, from sidechains to appchains, and public nodes. Regardless of your environment/protocol choice, the first step is to establish a business network that will serve as the parental resource for blockchain environments and the various runtimes within.
Select a cloud provider and underlying region to serve as the home region for your network. This will, in turn, whitelist the selected cloud provider and underlying region, and is where your resources will be hosted on the Starter Plan. The choices are AWS US East, AWS EU Central, AWS APAC Southeast, AWS APAC Northeast, Microsoft Azure US West, and Microsoft Azure France. Click NEXT.

Note that multi-region consortium are not available on the Starter Plan. If you wish to enable multi-region capabilities, refer to the Manage Plan section in our docs for instructions on upgrading your subscription. Click Finish to finalize your consortium.

At this point, your business network is simply a namespace with an underlying home region, a name, and your Kaleido organization existing as the sole membership.

In the lefthand navigation menu, click the Governance tab and then Memberships to see the existing memberships in your business network. As the founder, your organization is automatically attributed to the first membership in the network.
You can add additional memberships by clicking the ADD MEMBERSHIP button under your current memberships. Any subsequent memberships will be bound to your organization.
Memberships are the Kaleido resource that is bound to nodes, services, and security credentials. Adding additional memberships is a useful technique for networks where resources need to be proxy operated, or in scenarios where an operator wishes to mock out the future participation of a decentralized network. For this quick start, we will proceed with a single membership.
Switch back to your business network home page by clicking the Dashboard tab in the lefthand navigation menu.
Next, click the Create Environment button to generate your first blockchain namespace. An environment in Kaleido is an isolated domain with nodes, services, and security credentials confined solely to it. Each environment is its own unique blockchain.

Kaleido offers two top-level environment types: Standard Blockchain Service and Standard Blockchain Service + FireFly SuperNode.
Choose the Standard Blockchain Service tile and then click NEXT.

The Standard Blockchain Service orchestration supports three protocol choices: Enterprise Ethereum variants (Geth, Quorum and Besu), Corda, and Hyperledger Fabric. In this tutorial we're going to select Hyperledger Fabric, but you can see how easy it is to select the protocol of your choice.
Choose the Fabric tile and click NEXT.

Provide a name for your environment (e.g., Development) and click NEXT. Note that the Deployment Region is automatically inherited from your business network configuration.
Leave the default choices of Fabric 2.4 and Raft consensus selected and click FINISH.

Kaleido adds immense simplification to your overall Fabric experience by abstracting underlying complexities like Certificate Authority management, network governance, chaincode lifecycles and channel orchestration. This makes it simple to get Fabric chains live to run any number of use cases.
To learn more about what is happening under the covers, please refer to the available Fabric protocol documentation in the "Kaleido Platform" section. In contrast, this documentation is positioned as a lightweight "happy path."
Now that the environment has been created, we can start to deploy the requisite Fabric building blocks.
The first two runtimes that you need are a Certificate Authority and an Orderer Node. The Certificate Authority is responsible for registering and enrolling end user identities, and provides the underlying x509 PKI material needed for authentication. The Orderer Node is tasked with verifying and packaging endorsed transaction objects from client applications and delivering them back to peer nodes within a block.

Click the CREATE NODE button in the middle of the screen.
The first action is to create an Orderer Node. Use the dropdown menu and choose the available membership that you wish to bind the node to.
Supply a name for the Orderer Node (e.g. Orderer 1) and click NEXT.

The subsequent step is to create a Certificate Authority associated with the same membership that is bound to your Orderer Node. For ease of use we highly recommend using the default setting of "Self-Signed." Feel free to optionally alter the CA's name, and then click NEXT.

Click NEXT to skip the cloud integrations panel. These are unavailable on the Starter Plan and are out of scope for this tutorial. Refer to the Manage Plan section of the docs if you wish to upgrade your subscription and subsequently apply cloud integrations.
Leave the default configuration of "Small" on the final panel, and then click FINISH to deploy the Orderer Node and CA.

Wait for the CA and Orderer Node to transition to a "Started" state. This usually takes ~60 seconds.
Once both runtimes are started you can proceed to create your Peer Node. Click the CREATE NEW button within the "Peer Node" tile.

Provide a name for the peer and associate it with the same membership that is bound to the CA and Orderer. Click NEXT.
The existing CA will be automatically inherited as the membership services provider. Click NEXT.
Click NEXT to skip the cloud integrations page and then click FINISH to deploy the peer node.
A functioning environment should show at least one Certificate Authority, Orderer Node and Peer Node all in a "started" state.

Behind the scenes Kaleido automates the membership service provider (MSP) orchestration for both your Orderer and Peer nodes and leaves you with a fully bootstrapped channel - default-channel - that is ready to use.
NOTE: The autogenerated default-channel contains the System membership (bound to the system monitor node & used for the easy automation of adding new peers and orderers), along with the memberships of any peer nodes that you have added to the channel.
Let's look a bit more closely at two important channel policies for the default-channel:
The Chaincode Lifecyle Endorsement policy of ANY means that we only need a single member to approve and commit chaincode packages. The System Monitor does that heavy lifting for us and this means that we are able to deploy chaincodes with only a single endorsement signature.
Similarly, the Chaincode Endorsement policy of ANY means that we only need a single endorsement signature from one of our peer nodes in order for the invocation to succeed. As such, the default-channel with a single CA, Orderer Node and Peer Node is an out-of-the-box ready to use channel.
We did a Tech Tuesday on chaincode that provides a lot more information about the contract language of Fabric, if you'd like to learn more.
Should you want a custom channel with specific memberships or potentially without the System membership, the platform provides a click button simple experience for all things related to channel management.

The CHANNELS page will display a list of all channels in your Kaleido environment. Simply click on a channel name to perform any necessary admin operations (e.g. adding/removing members).

Now it's time to move on to the fun stuff. Deploying chaincodes, interacting with the Certificate Authority and sending transactions into the network. Hop over to the final section of this tutorial to continue. For a detailed guide on how to deploy your first chaincode on a Fabric chain, check out the quick start guide in our docs.
If you want to use this tutorial to start a Fabric chain of your own, follow this link to start a free trial.


Your guide to everything from asset tokenization to zero knowledge proofs
Download Now
Learn how Swift, the world’s leading provider of secure financial messaging services, utilizes Kaleido in its CBDC Sandbox project.
Download Now